Organizations
If your application is a B2B SaaS, you may need to represent your own customers in Auth.it. Organizations let you do that — linking users to a customer entity and enabling customer admins to manage their members in a multi-tenant context.
The Organizations view in the Auth.it Dashboard lets you create, view, and manage organizations.
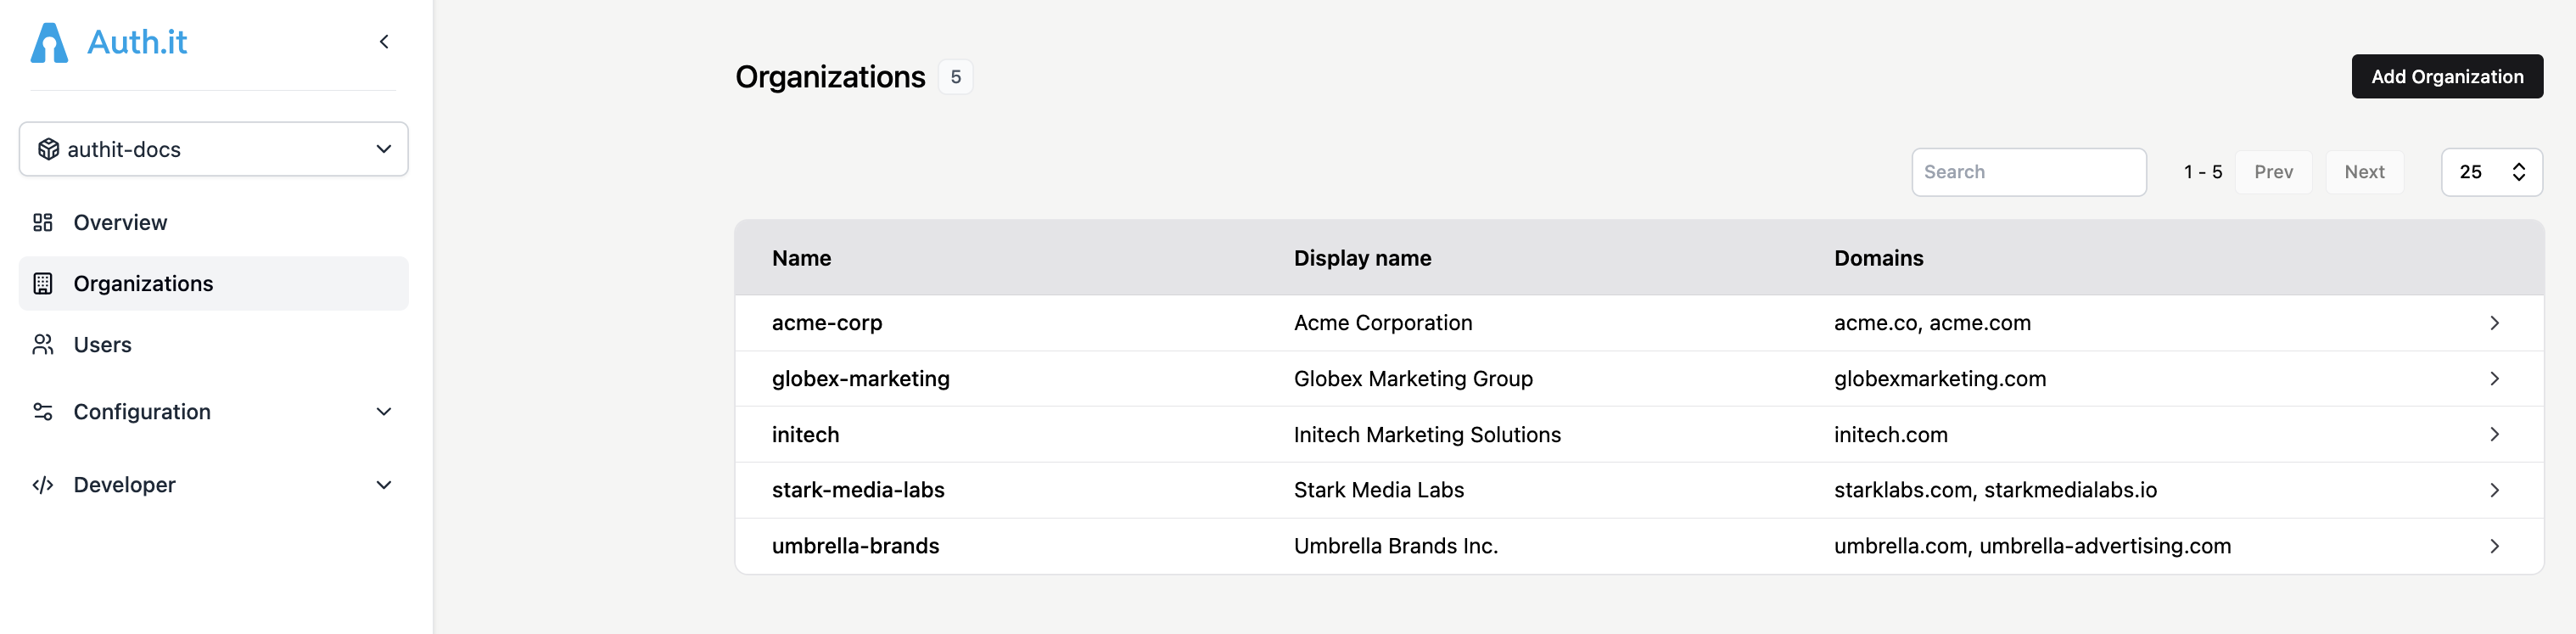
The search field above the table lets you filter organizations with a partial match across all columns.
Creating an organization
To create a new organization, click Add organization at the top right of the Organizations view. This opens the Add Organization dialog:
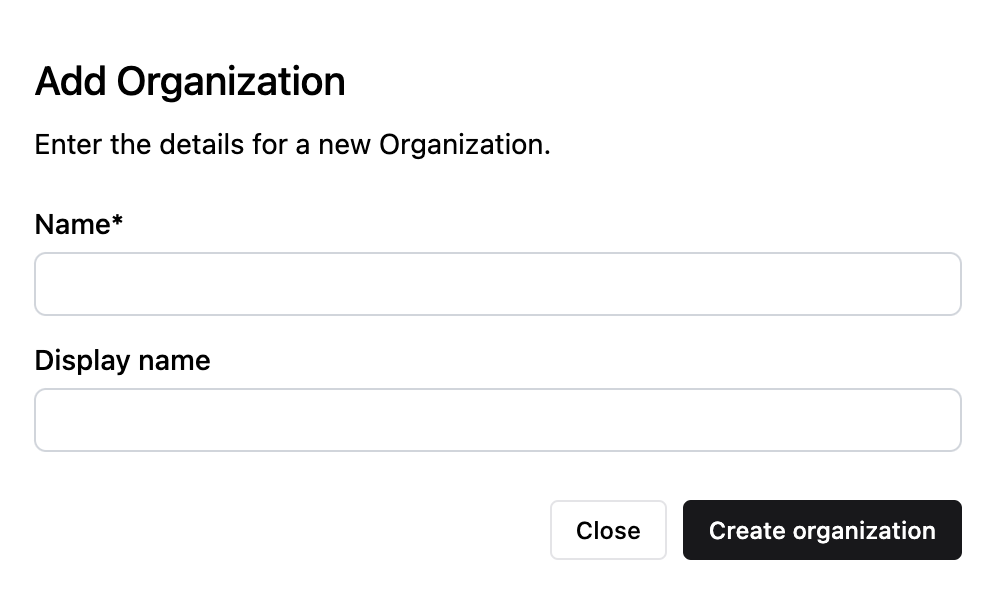
In the Name field, enter a short, simple name without spaces. The name acts as a “slug” and is used in token claims.
Optionally, enter a longer, more descriptive name in the Display name field.
After clicking Create organization, the new organization will be added to the list.
Settings
Clicking an organization in the list opens its profile, which includes several tabs. By default, the Settings tab is displayed:

The Settings tab consists of three sections: Authentication, Details, and Danger.
Authentication
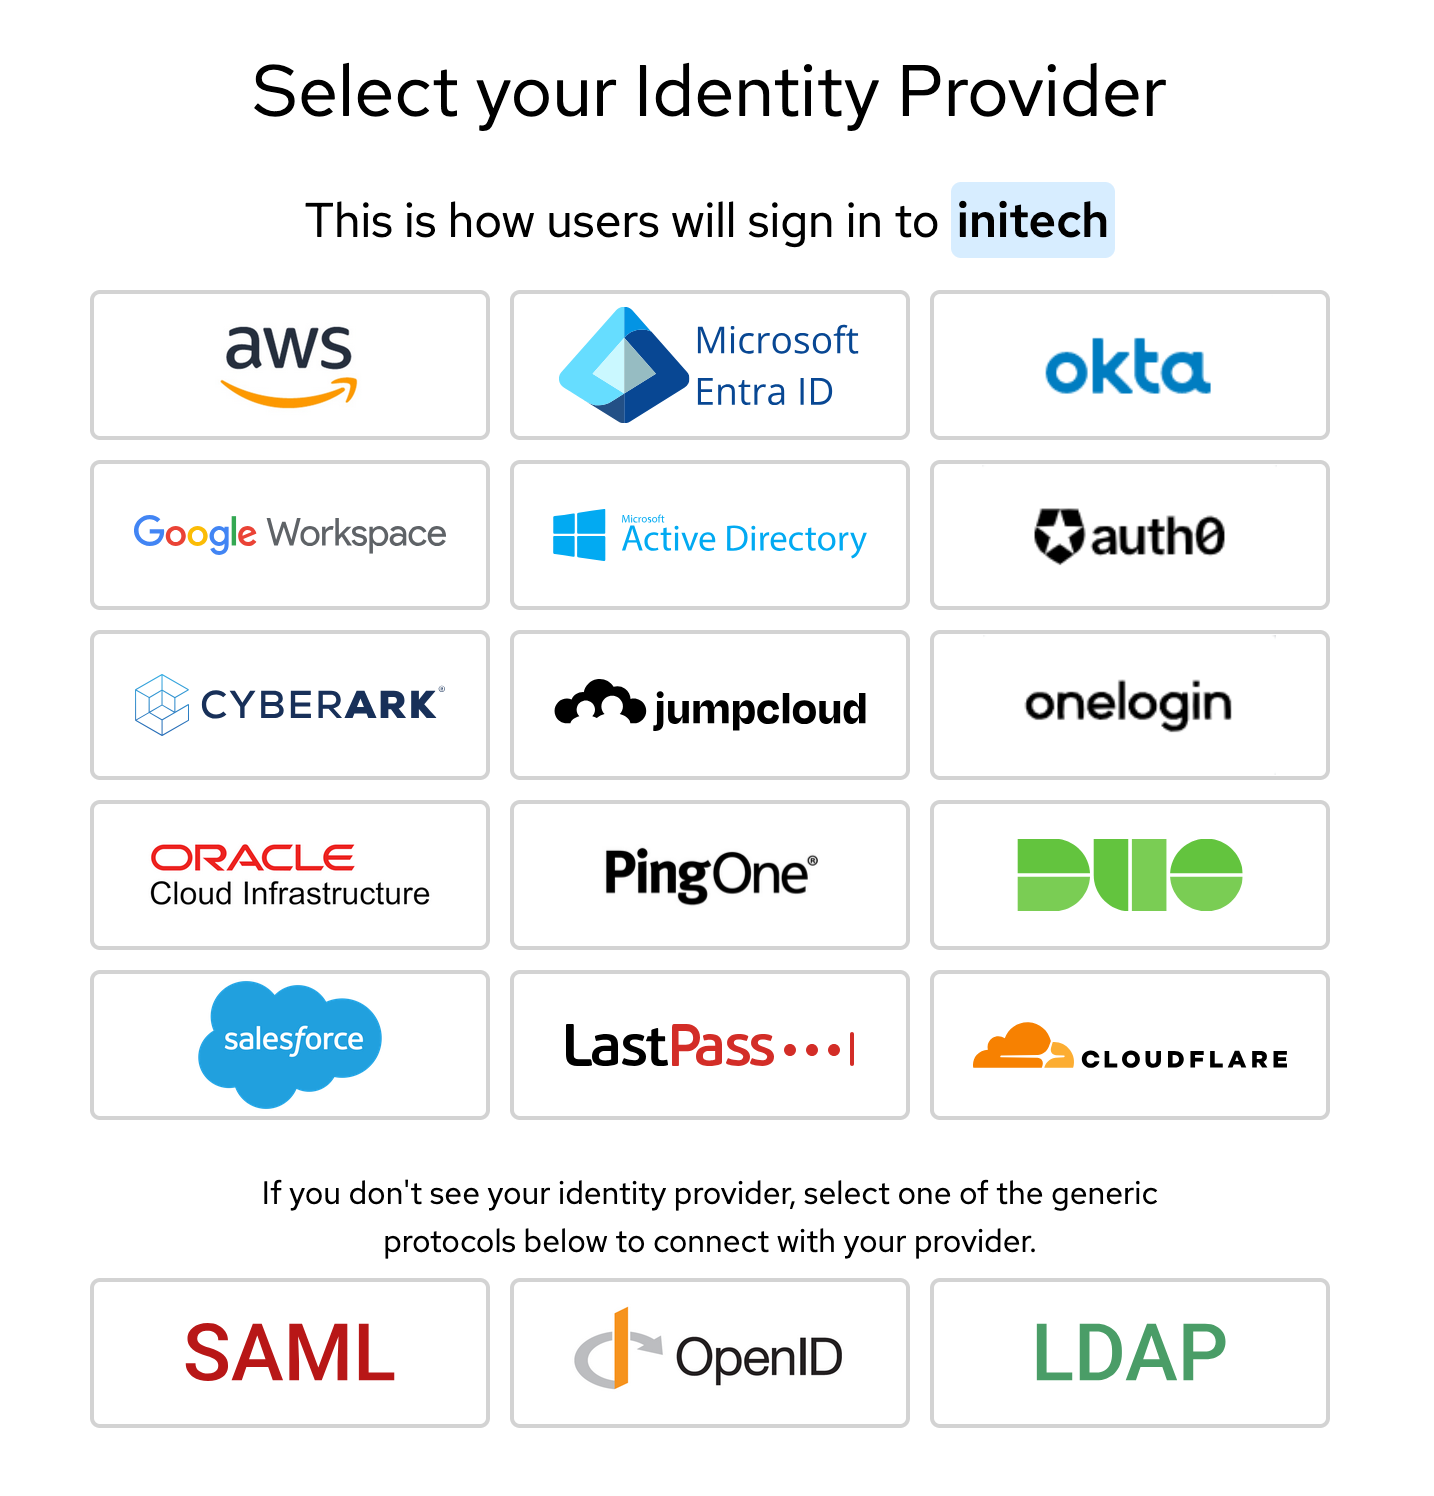
The Authentication section lets you configure a third-party SSO identity provider (such as Microsoft Entra ID, Okta, or Google Workspace) to authenticate the organization’s members.
To help the organization’s administrator set up SSO, click Generate SSO Setup Link, then provide the generated link to the administrator.

When the administrator opens the link, they’ll be guided through a wizard to configure their SSO identity provider and collect the information needed for Auth.it to link it to their organization.
Auth.it redirects the organization’s users to the SSO identity provider’s login page based on their email domains once all the following conditions are met:
- SSO setup using the setup link is complete.
- SSO is enabled in the Auth.it Dashboard’s Authentication view.
- The organization’s email domains are configured in the Details section (see below).
Details
In the Details section, you can modify the organization’s basic information: name, display name, and URL.
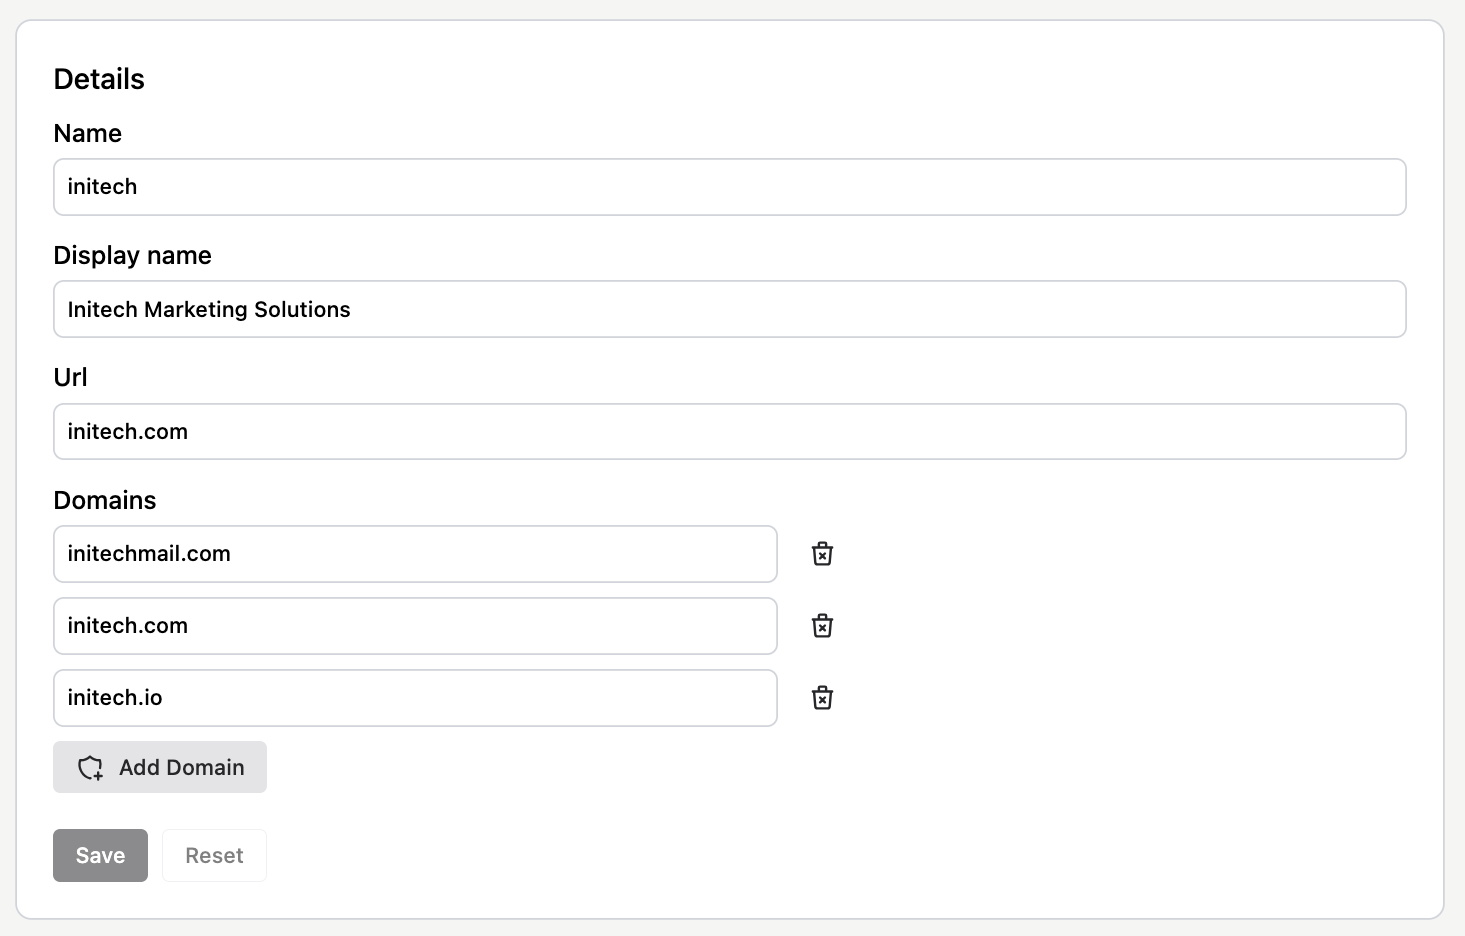
Another setting, Domains, lets you specify all domains controlled by the organization. This is relevant for SSO: when a user tries to log in with an email under one of these domains, they are redirected to the organization’s SSO identity provider configured via the Authentication section.
For example, if a domain is initech.com, a user logging in as frank-simon@initech.com will be redirected to that organization’s SSO provider.
Danger
The last section in the Settings tab lets you delete the organization.
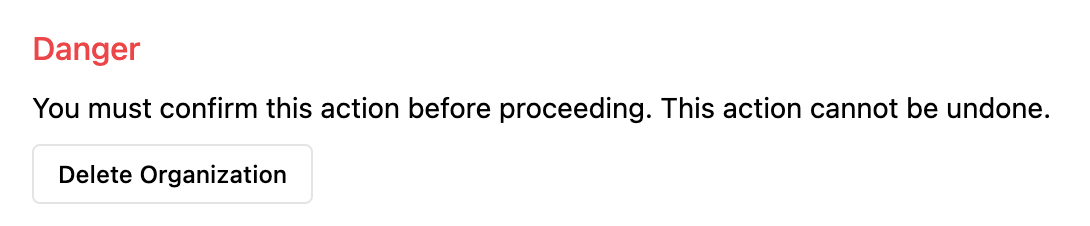
When you delete an organization, all data associated with it is removed — including attributes, user memberships, roles, and linked identity providers. Use this action carefully.
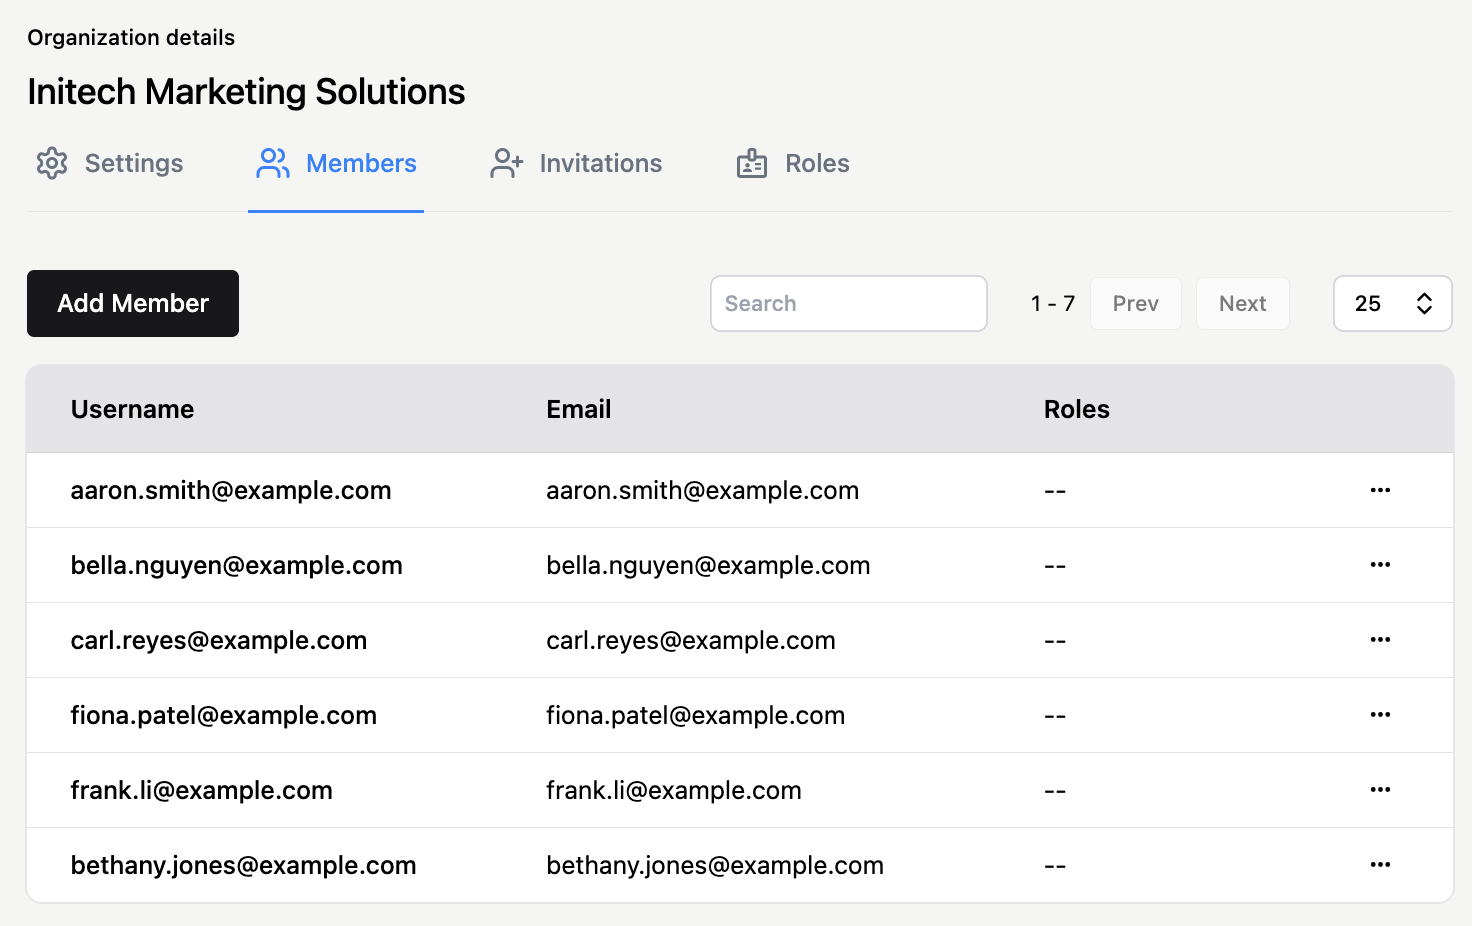
Members
The Members tab of the organization profile lets you add users as members of the organization and assign them roles.
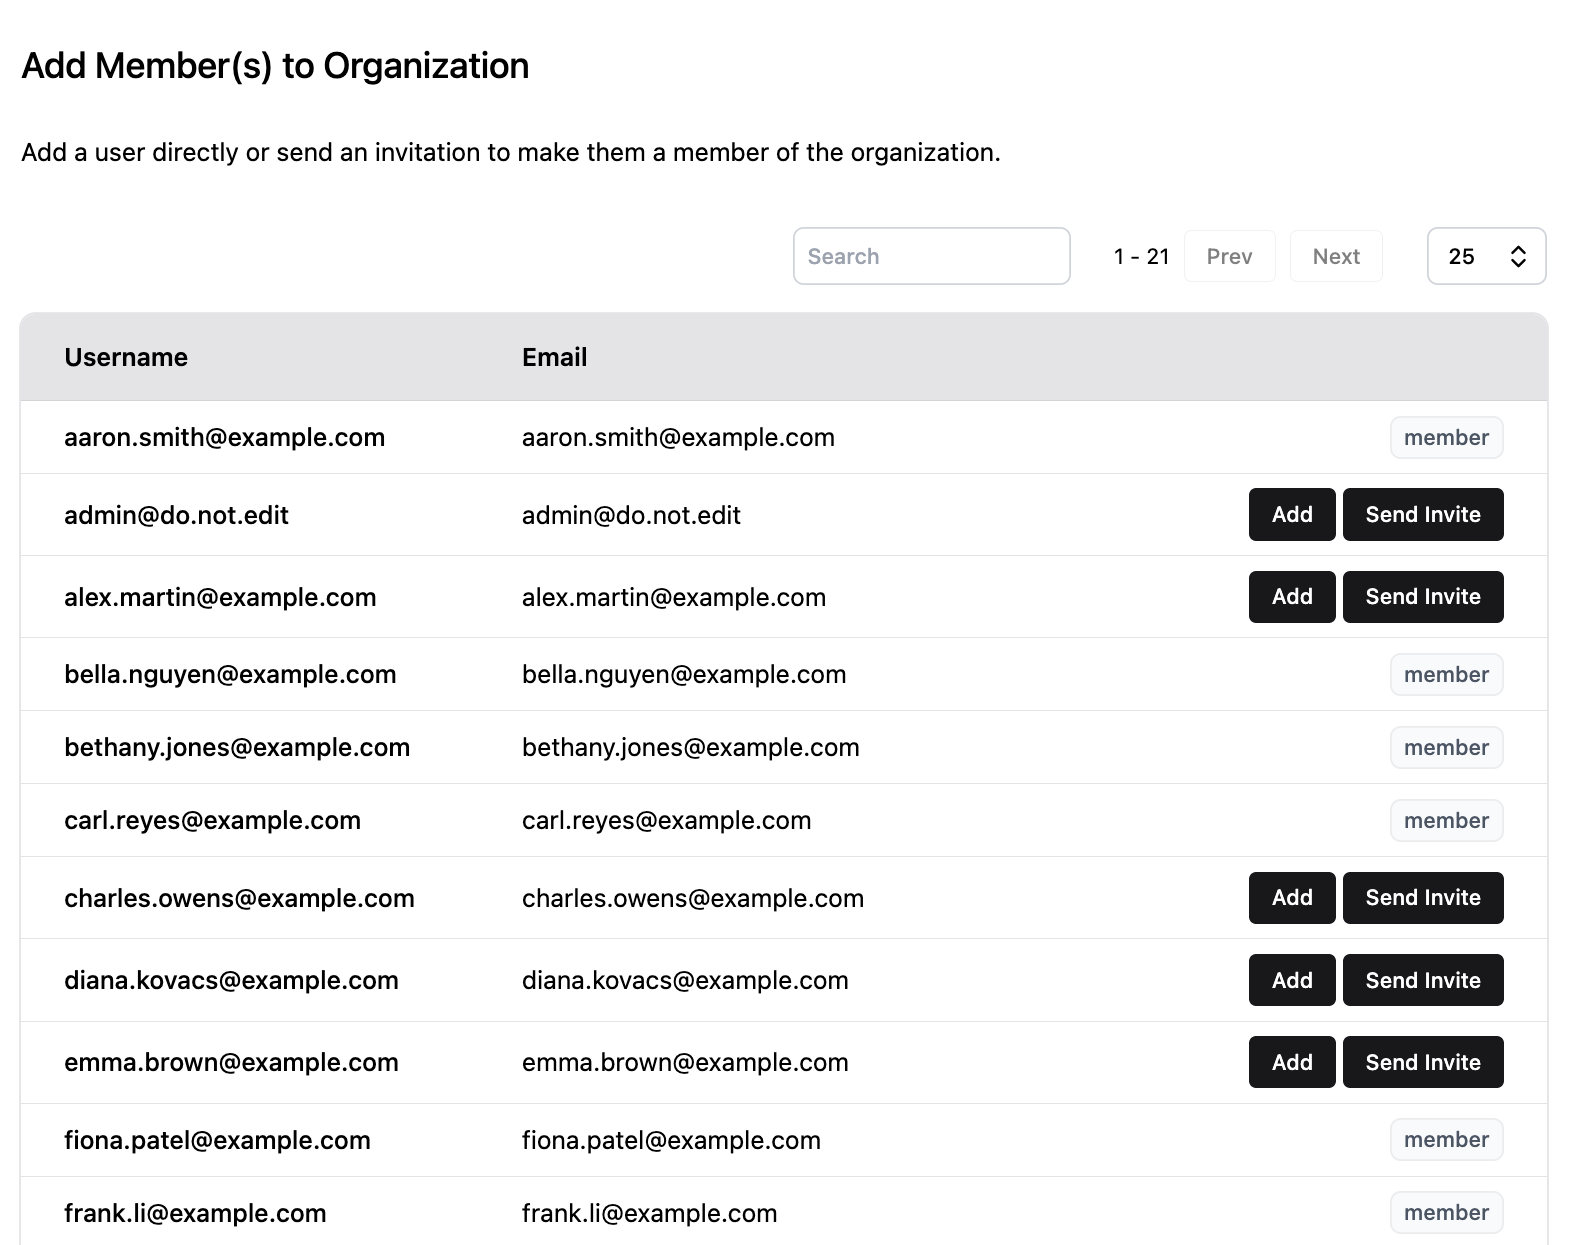
Click Add Member to open a dialog showing the list of users in your Auth.it instance. You can make any user a member immediately by clicking Add, or invite them to join by clicking Send Invite. In the latter case, the user must accept or reject the invitation via an email link.
Back in the members list, click the three-dot menu to the right of a member’s entry to perform actions such as viewing the member’s user profile, impersonating the user, or removing them from the organization.
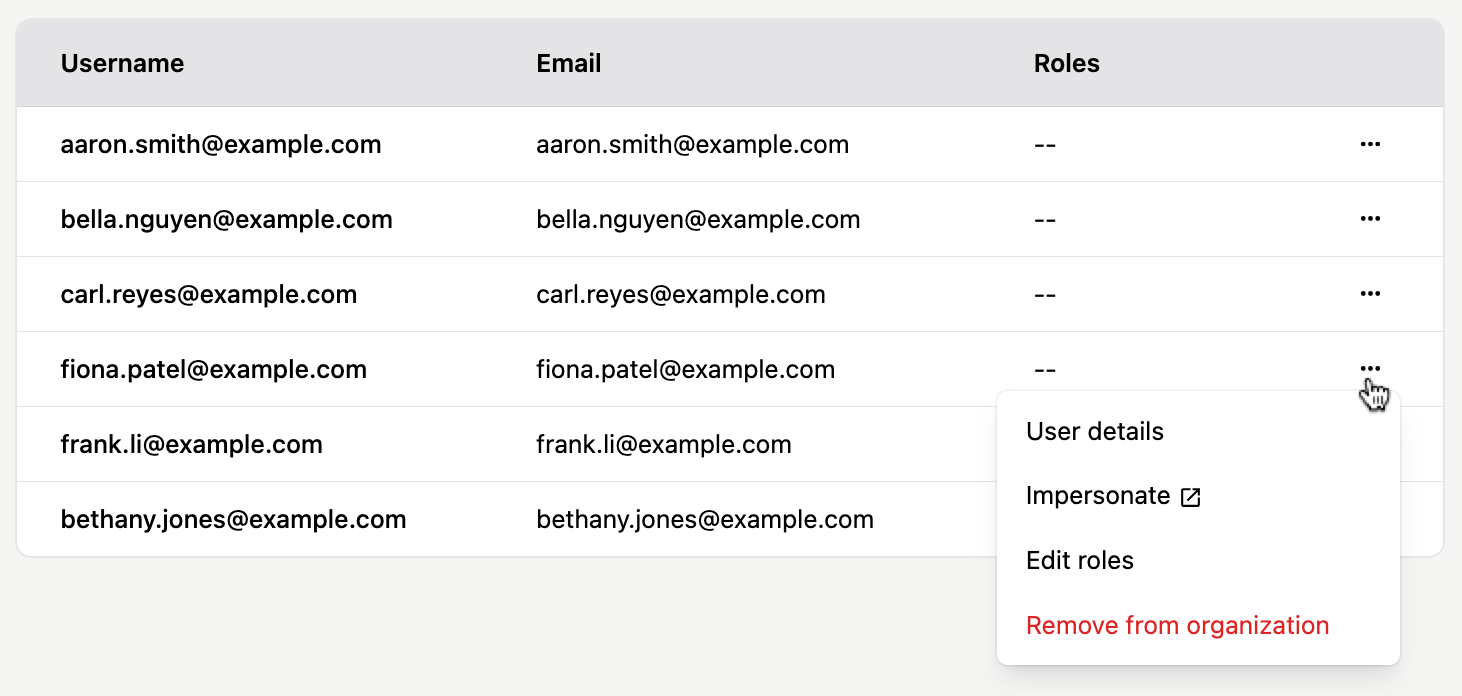
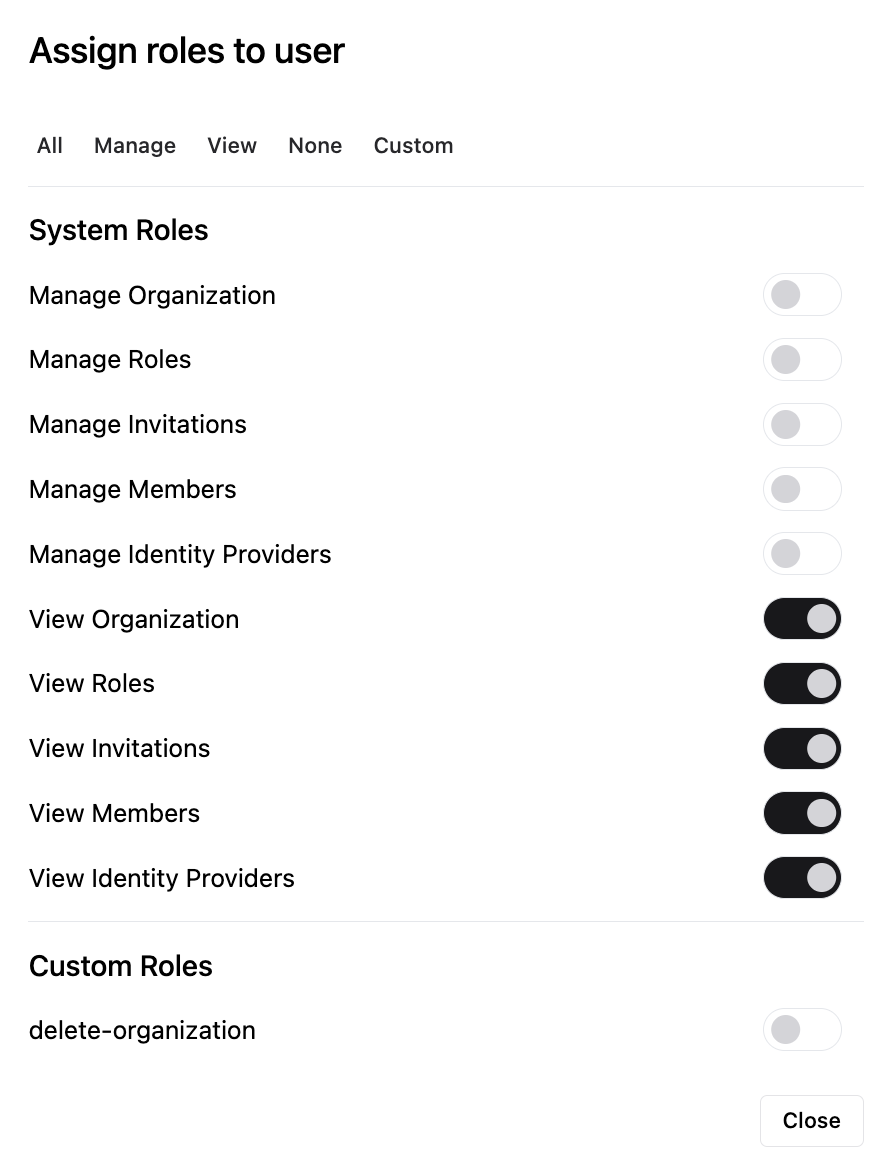
The context menu also lets you assign roles to the member. Clicking Edit roles opens the Assign roles to user dialog, which lists all organization roles defined in the Roles tab, including both system and custom roles.
By default, a new member has no roles assigned. You can assign roles individually or use the shortcuts at the top of the dialog to assign/unassign all roles, only management-level, only view-level, or only custom roles.
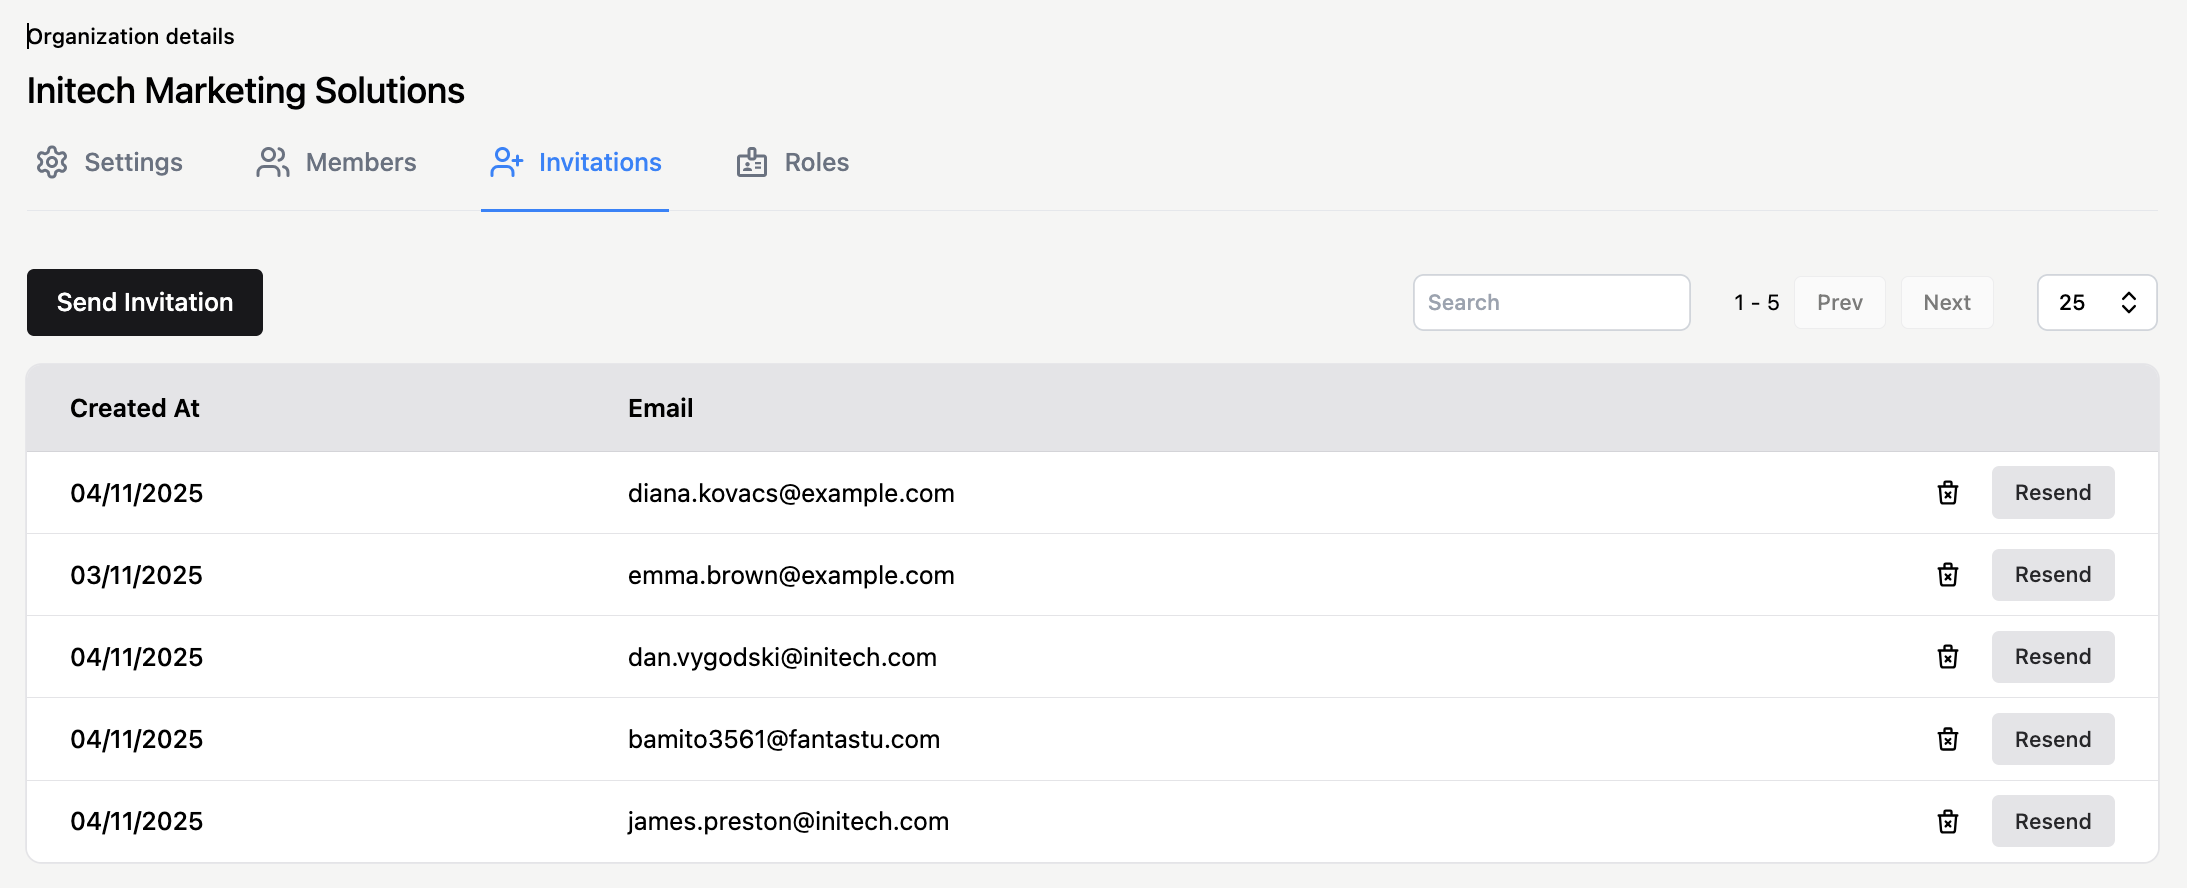
Invitations
The Invitations tab shows pending invitations sent to potential members and allows you to send new ones.
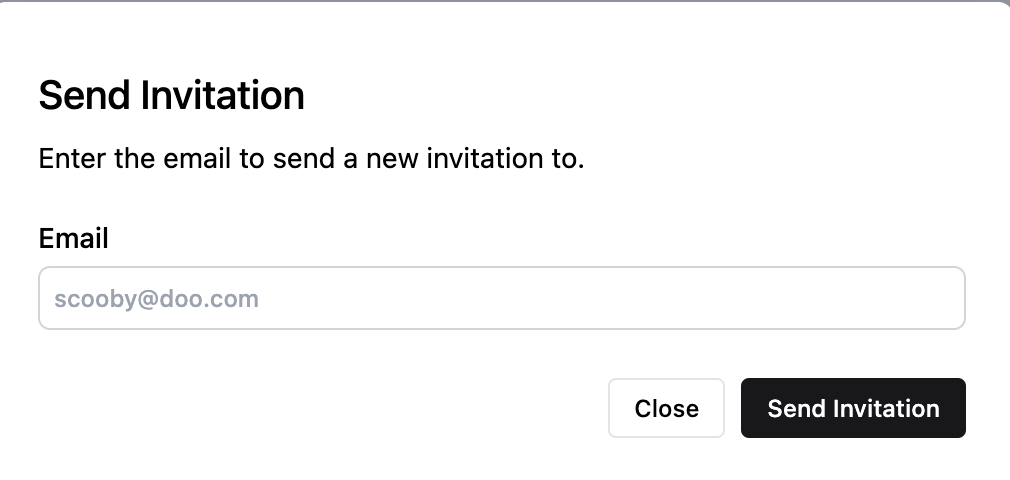
The Add Member dialog in the Members tab invites existing Auth.it users. In contrast, clicking Send Invitation in the Invitations tab lets you send invites to any email address, even if no matching user profile exists in your Auth.it instance.
Once invitations are sent, they appear in the list. You can revoke or resend an invitation by clicking the icons to the right of each entry.
Roles
The Roles tab lets you view and add roles specific to the organization. Unlike global roles, organization roles are unique to each organization.
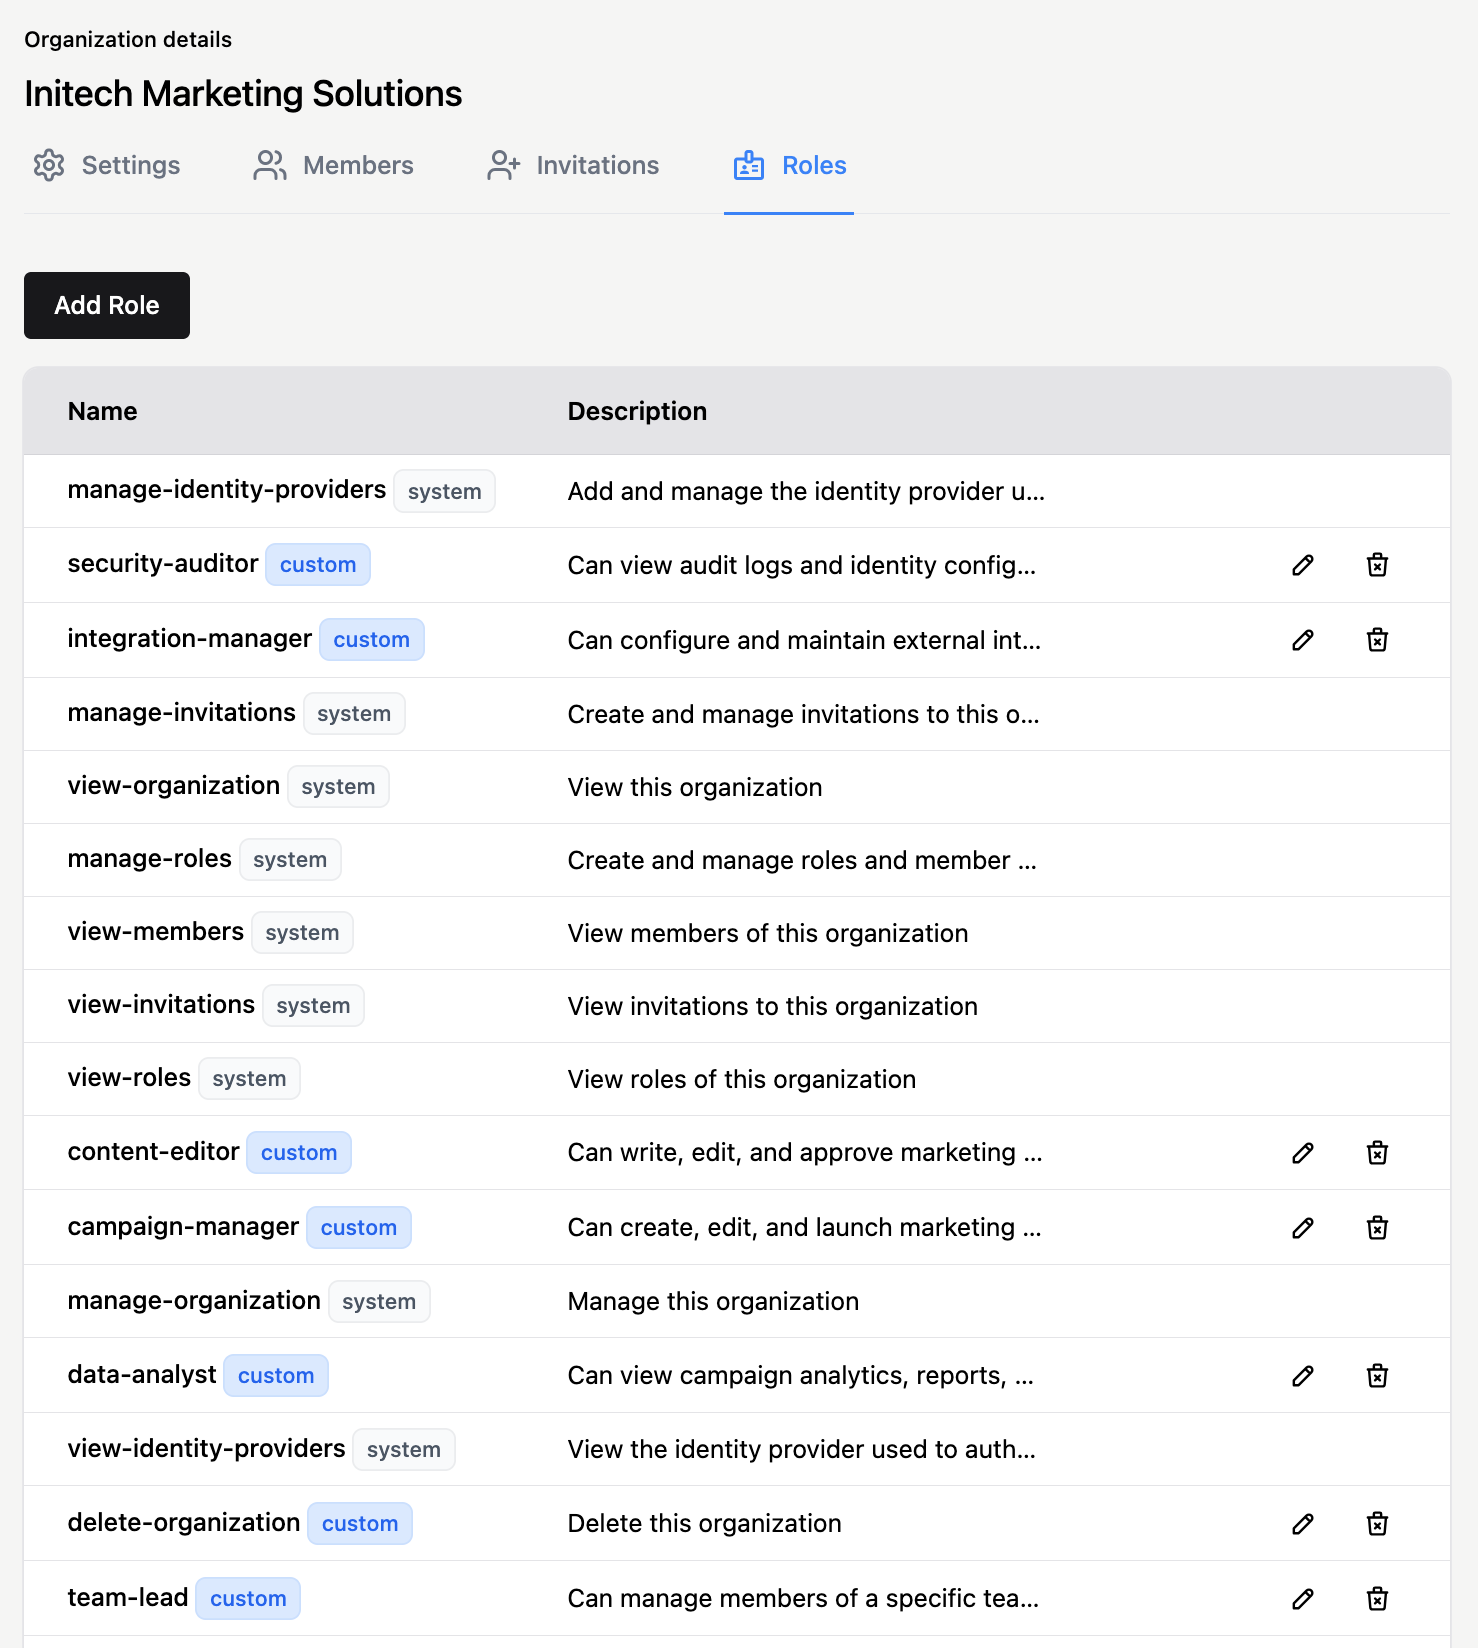
That said, every organization includes a predefined set of system roles that cannot be removed. In the list, these are marked with the system tag. They can be granted to members to allow access and management of specific organization data.
Beyond these, you can create custom organization-scoped roles by clicking Add Role. These roles can be used by your application to group users within an organization and manage feature- or data-level access.
Each role consists of a name and a description. Once created, custom roles are marked with the custom tag in the list.
To assign roles to members, use the Members tab.