Quick Start Guide
This guide will walk you through the steps needed to build a minimal configuration in Auth.it and protect a sample application. The goal of this tutorial is to introduce you to the features of Auth.it, rather than provide a comprehensive review.
It is assumed that you are familiar with frontend developer tools and have a basic understanding of authentication.
You’ll need Node 18.12+ and the pnpm package manager to follow this guide.
To install pnpm, run the following command in your terminal:
Create an account
Navigate to the Auth.it Dashboard and log in with an email address or social account (GitHub and Google are currently supported).
If you provide your email address, you will be registered and sent an email with a magic link. Click the magic link to continue the authentication session.
Name your project
If this is your first time logging in, you will be prompted to create and name your project environment. This name will be used in URLs (e.g., acme.authit.cloud), so make it short and meaningful (e.g., a company name).
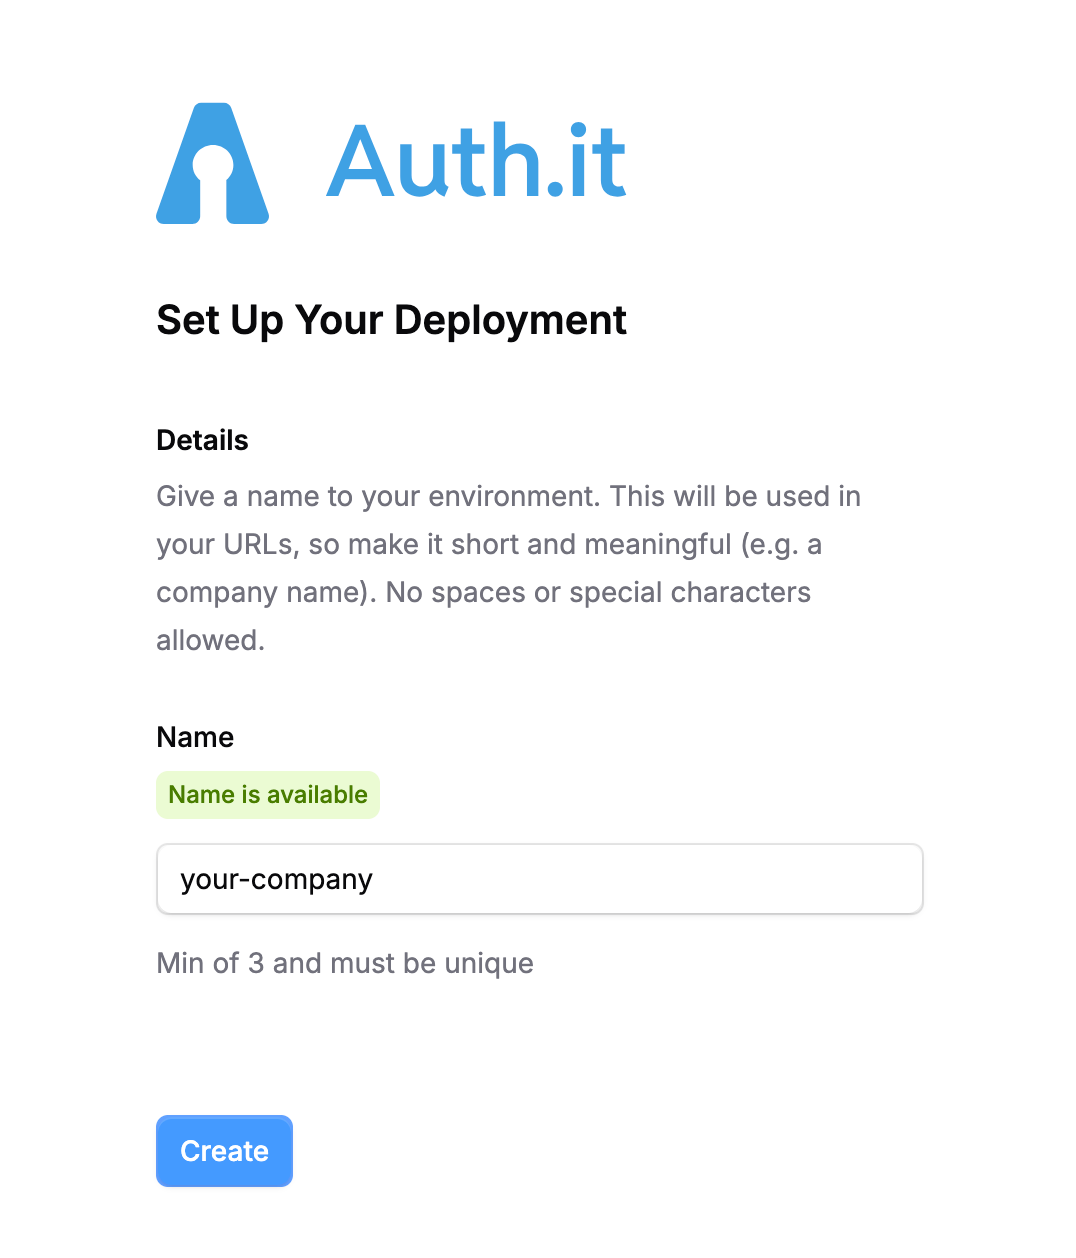
After choosing a name for your project environment, the system will take a few moments to set up your deployment.
Set up the example application
Once you have logged in to the Auth.it Dashboard for the first time, you will see a guide on the overview page that shows the next steps to protect your application.
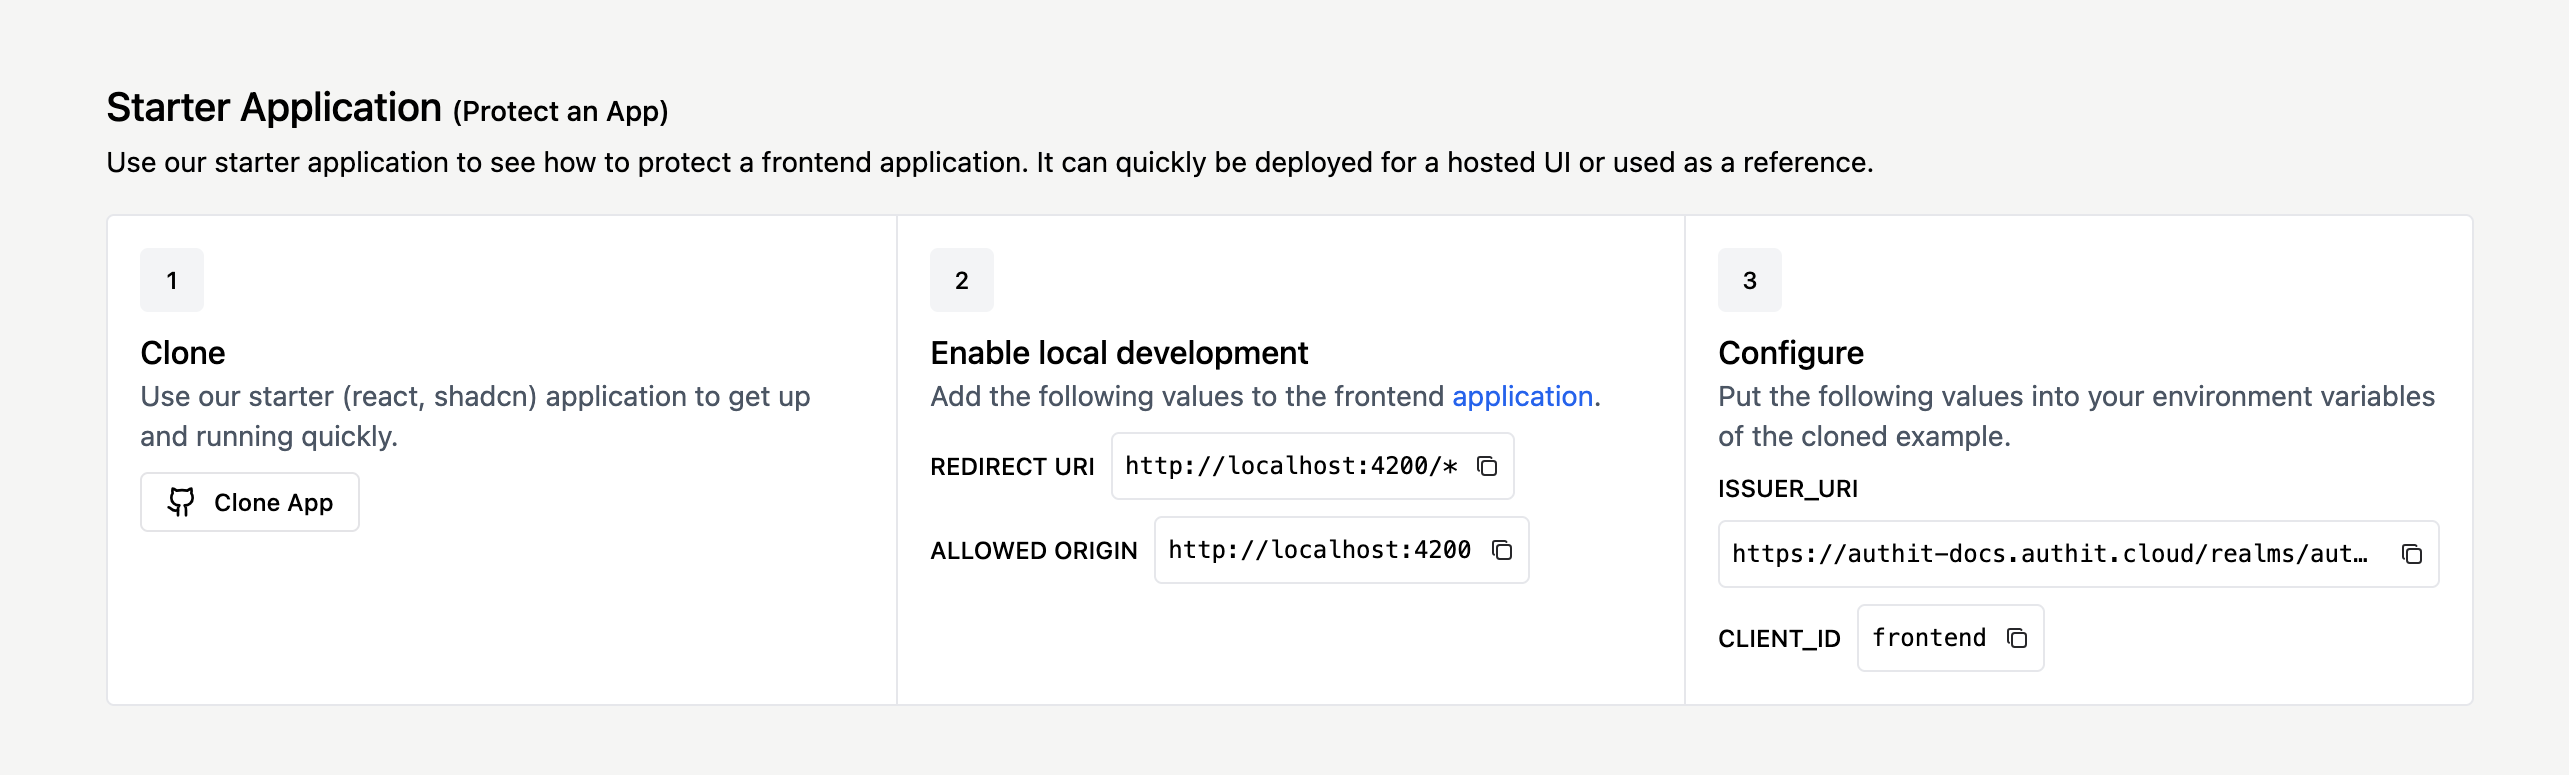
Clone
Go to GitHub and clone our Auth.it starter application repository. This is a sample application demonstrating how to quickly and securely protect an application using OpenID Connect, the standard protocol Auth.it uses for authentication. It uses react-router-dom, oidc-spa, and Vite to show you how to secure and provide user identity to a single-page application (SPA). Please use this as a basis to start your own applications or protect an existing one.
You can clone the project using your favorite IDE. If you prefer working in the terminal, enter the following two commands:
Configure
In the starter application repo that you cloned, find the file named env.local.sample and make a copy of it called env.local. Inside the new file, set the ISSUER_URI and VITE_AUTHIT_CLIENT_ID variables to the values provided in step 3 of the Starter Application block in the Auth.it Dashboard:
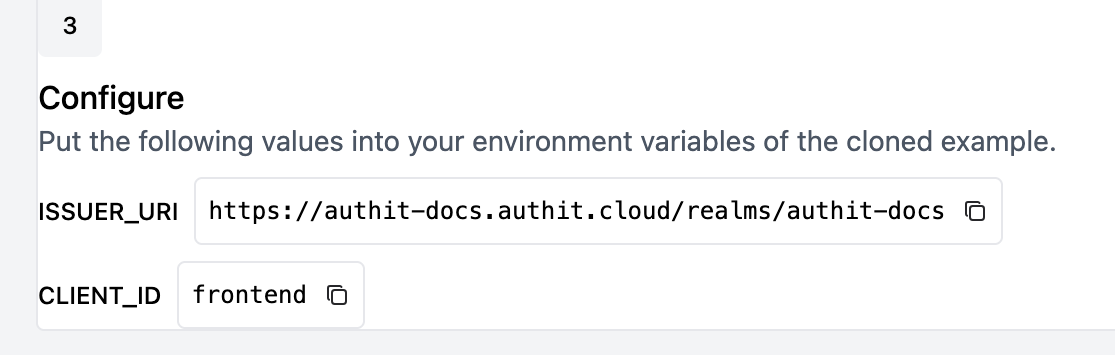
For example, if the ISSUER_URI is set to https://authit-docs.authit.cloud/realms/authit-docs and the CLIENT_ID is set to frontend in the Dashboard, then your env.local file should look like this:
Save the file before proceeding.
Redirect URIs
One of the fundamental roles of an authentication server is to ensure that the application requesting user authentication is authorized to do so on the user’s behalf. In the OpenID Connect protocol, this is enforced by setting allowed redirect URIs. To allow the starter application to make requests to Auth.it, you need to configure these redirect URIs.
Open the Developer → Applications view in the Auth.it Dashboard. In the Frontend Application section:
- Under Redirect URLs, add two redirect URIs:
http://localhost:5173andhttp://localhost:5173/*. - Under Allowed Origins (CORS), click Same as Redirect URIs.
- Click Update to save your changes.
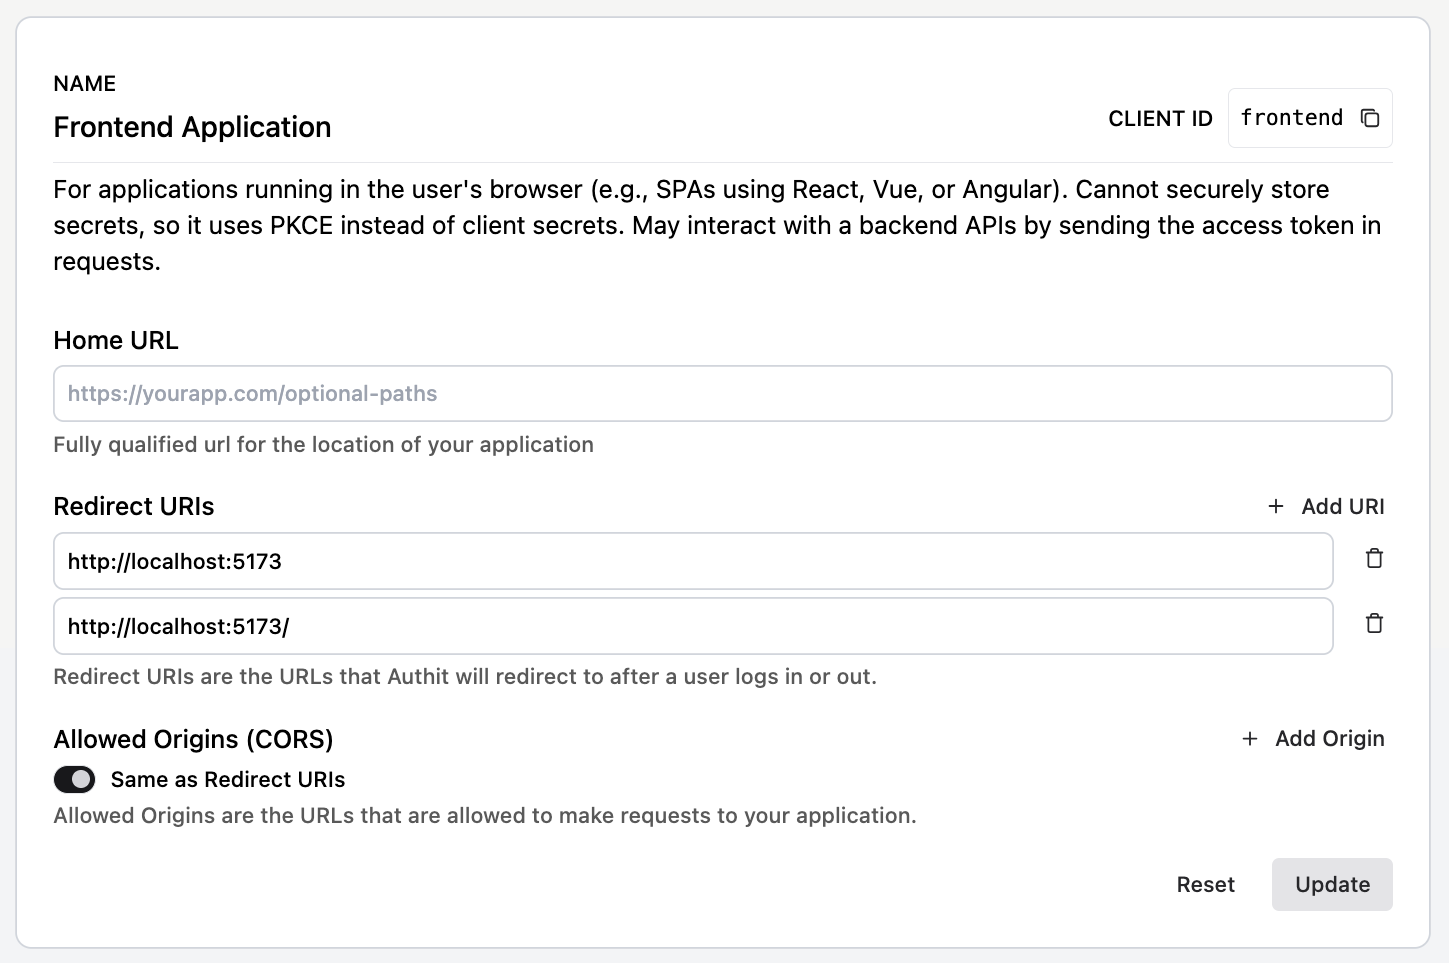
This tells Auth.it that it is allowed to redirect to your starter application after successful user authentication.
Try it
Start the application using pnpm:
Navigate to http://localhost:5173/ and click the Protected link at the top of the page. This will bring you to the user login page:
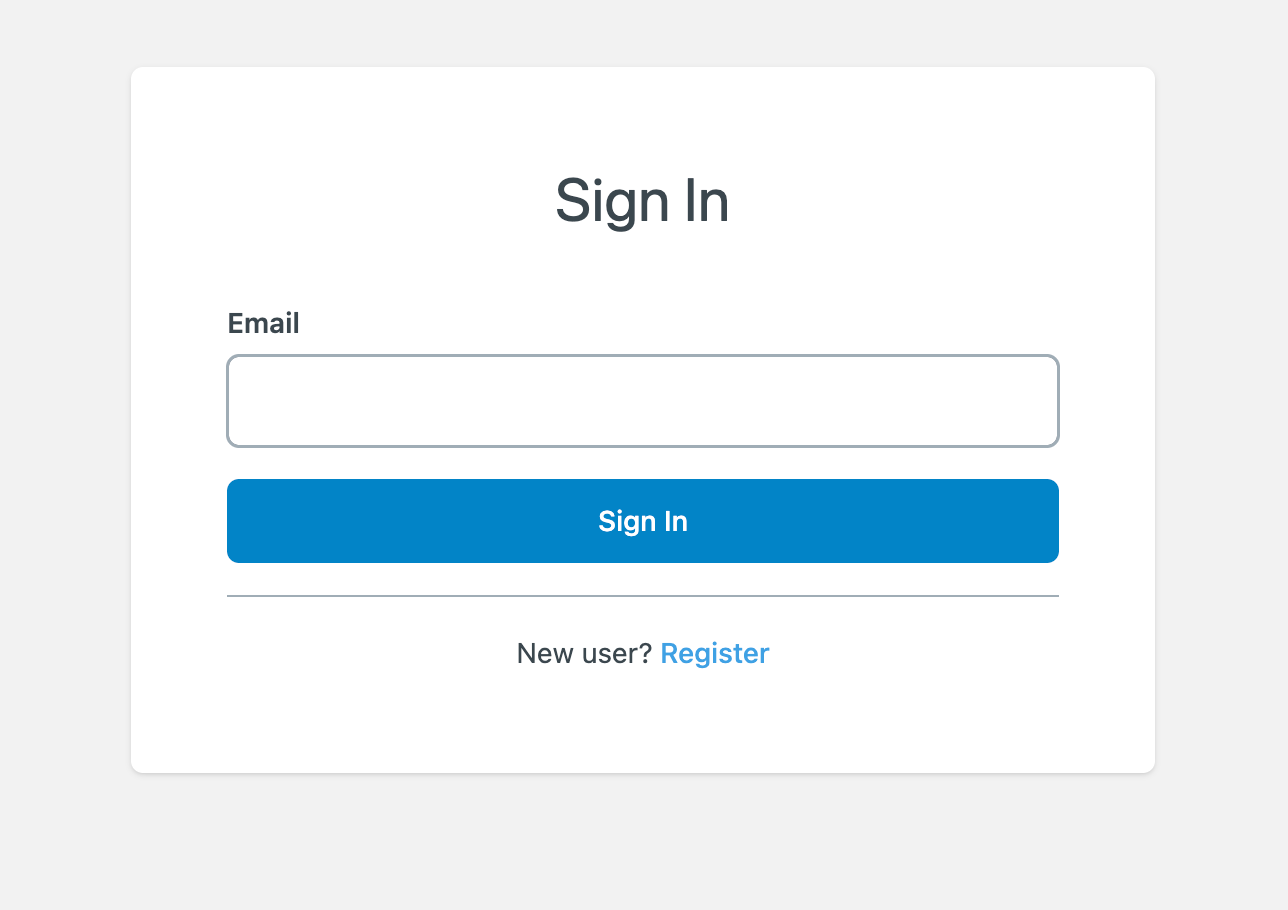
Voila! You have already protected your first application.
By default, Auth.it allows new users to self-register, so feel free to click Register to create a new account, then enter an email and set a password in the registration form.
Notice that if you’re using a password manager to create unique passwords, the password may not meet Auth.it’s default complexity-based password policy. The password policy is customizable, and we’ll look into it later on.
For now, click Register in the registration form. Once you do, you will be redirected to the protected page of our starter application after successful authentication.
Simple configuration
Let’s go back to the Auth.it Dashboard to explore what customizations are available.
Branding
Authentication is often the “front door” of your application, so it needs to match your branding and provide a smooth, attractive user experience. Navigate to the Configuration → Branding view of the Auth.it Dashboard to configure the style of your login pages.
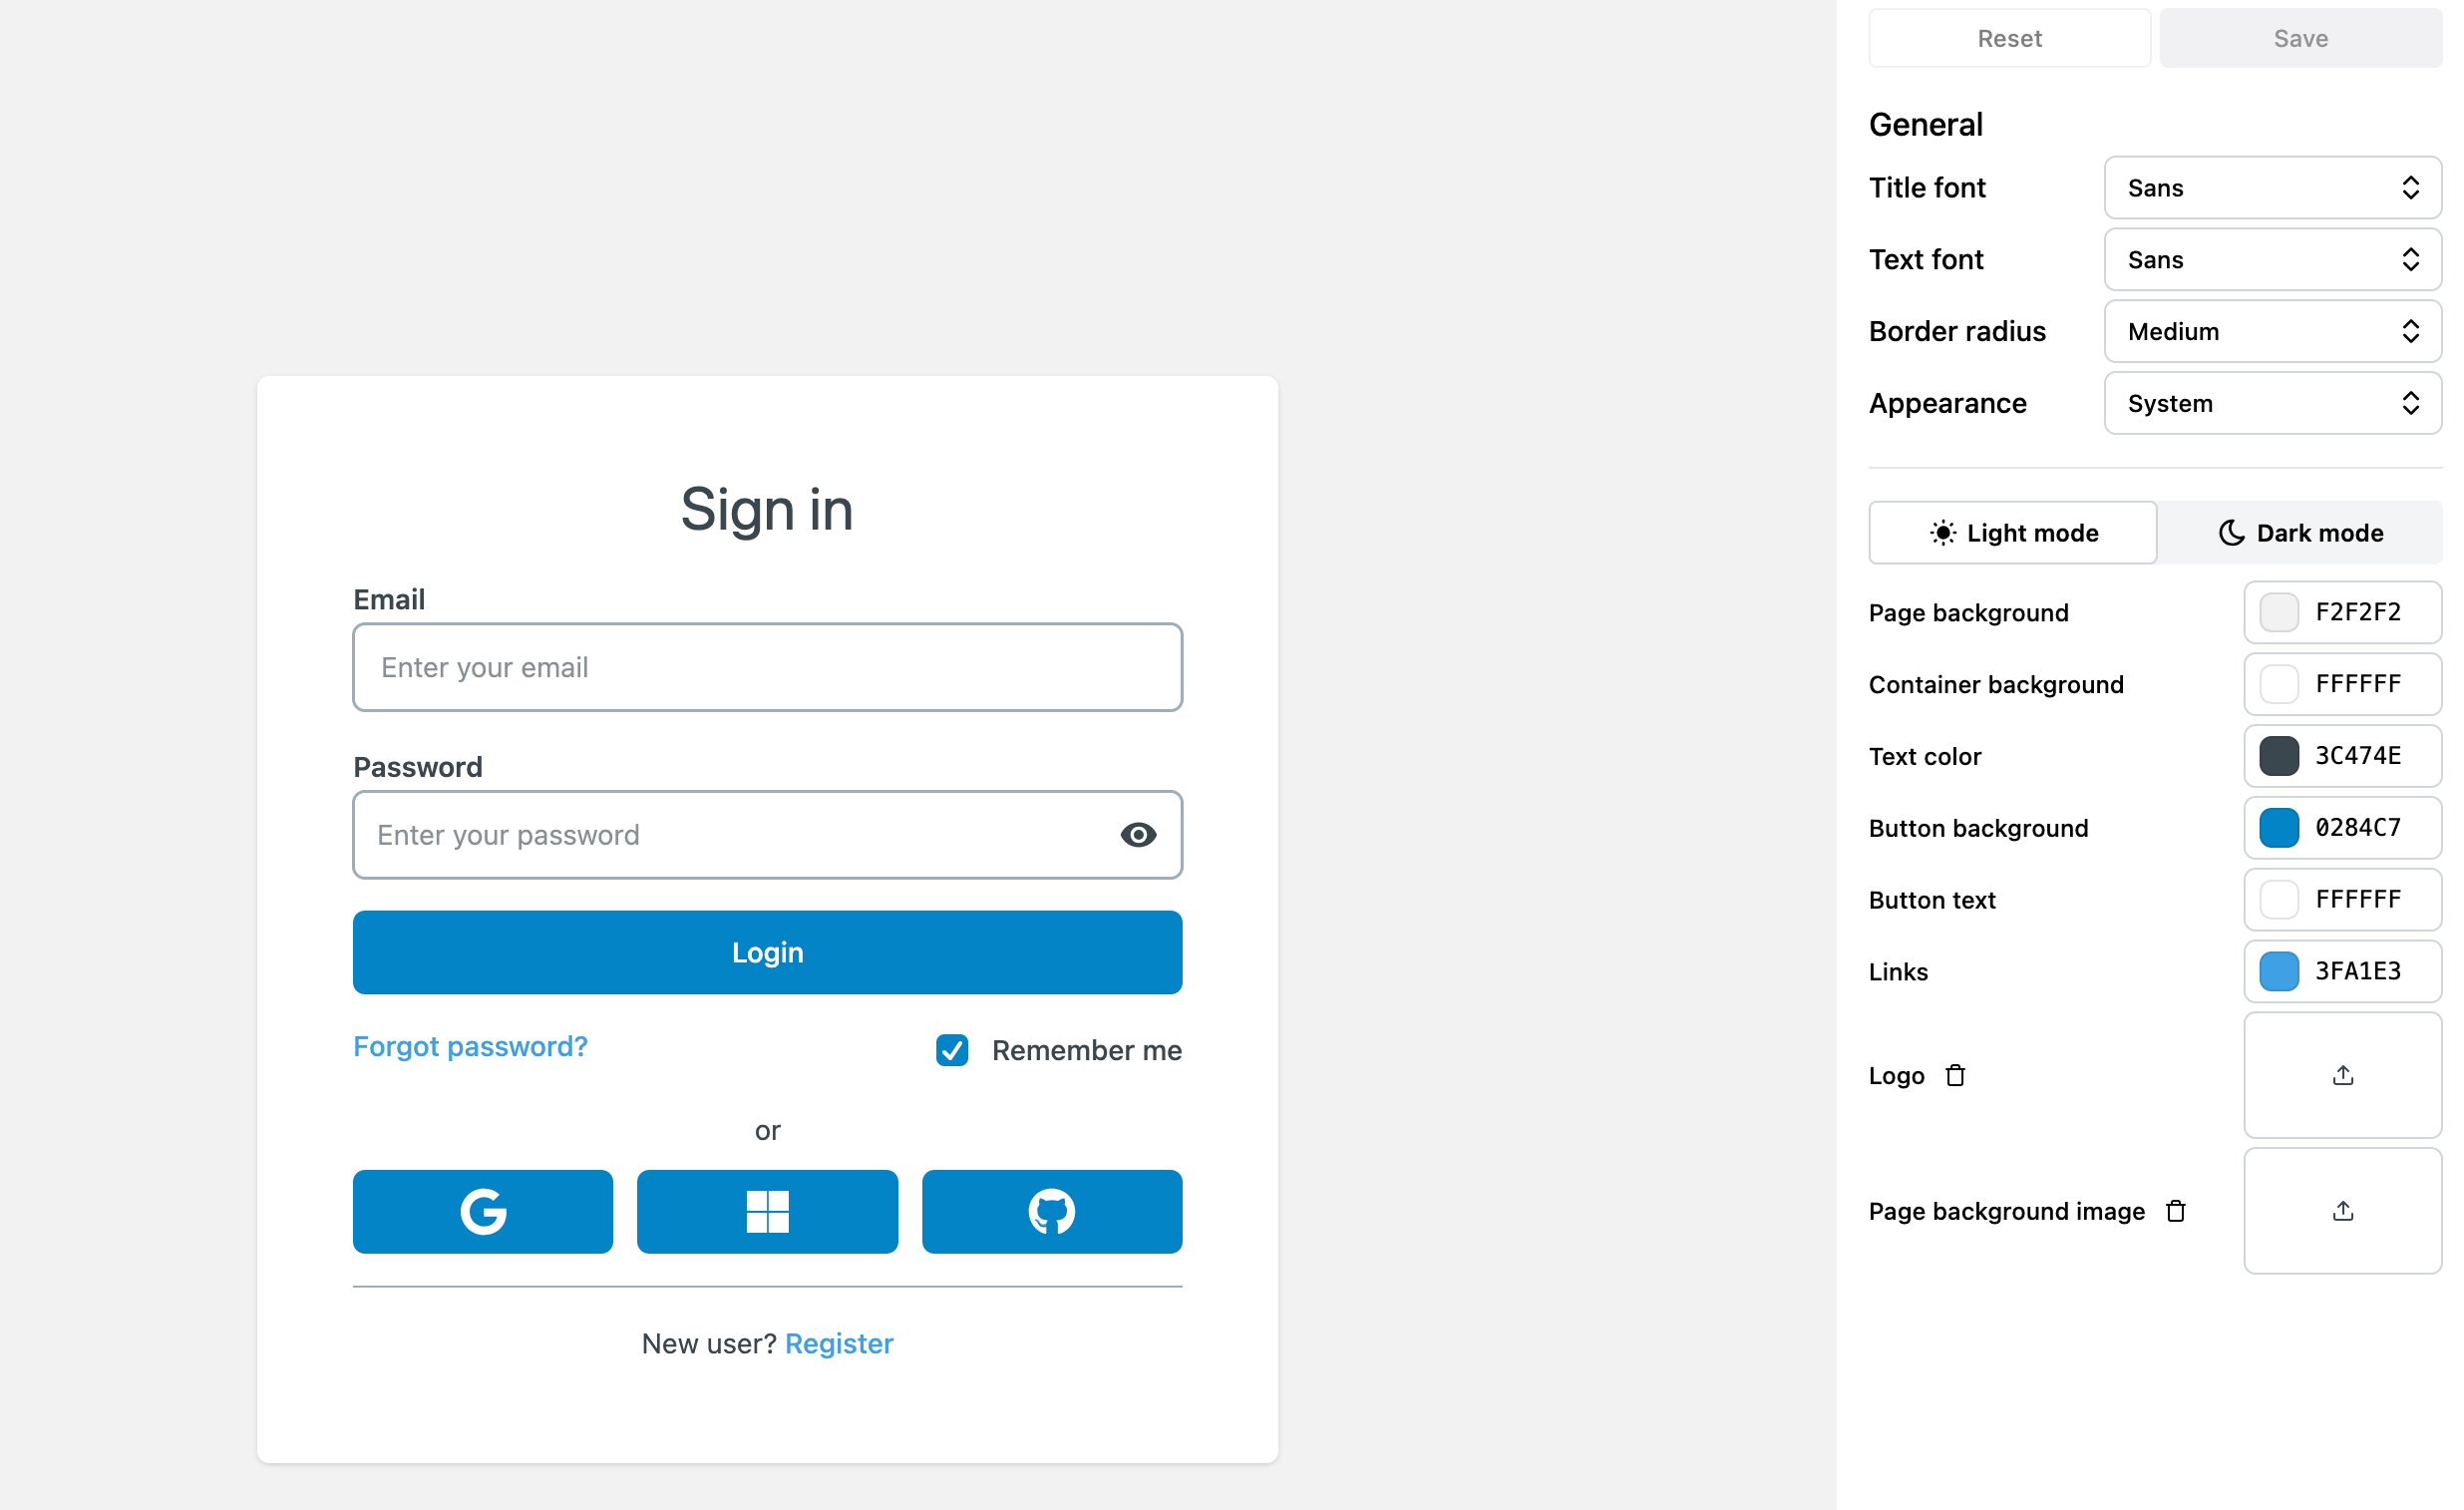
Here you can select colors, fonts, logos, and more, and see how they will look to a user. Once you’ve finished, click Save to make the changes live.
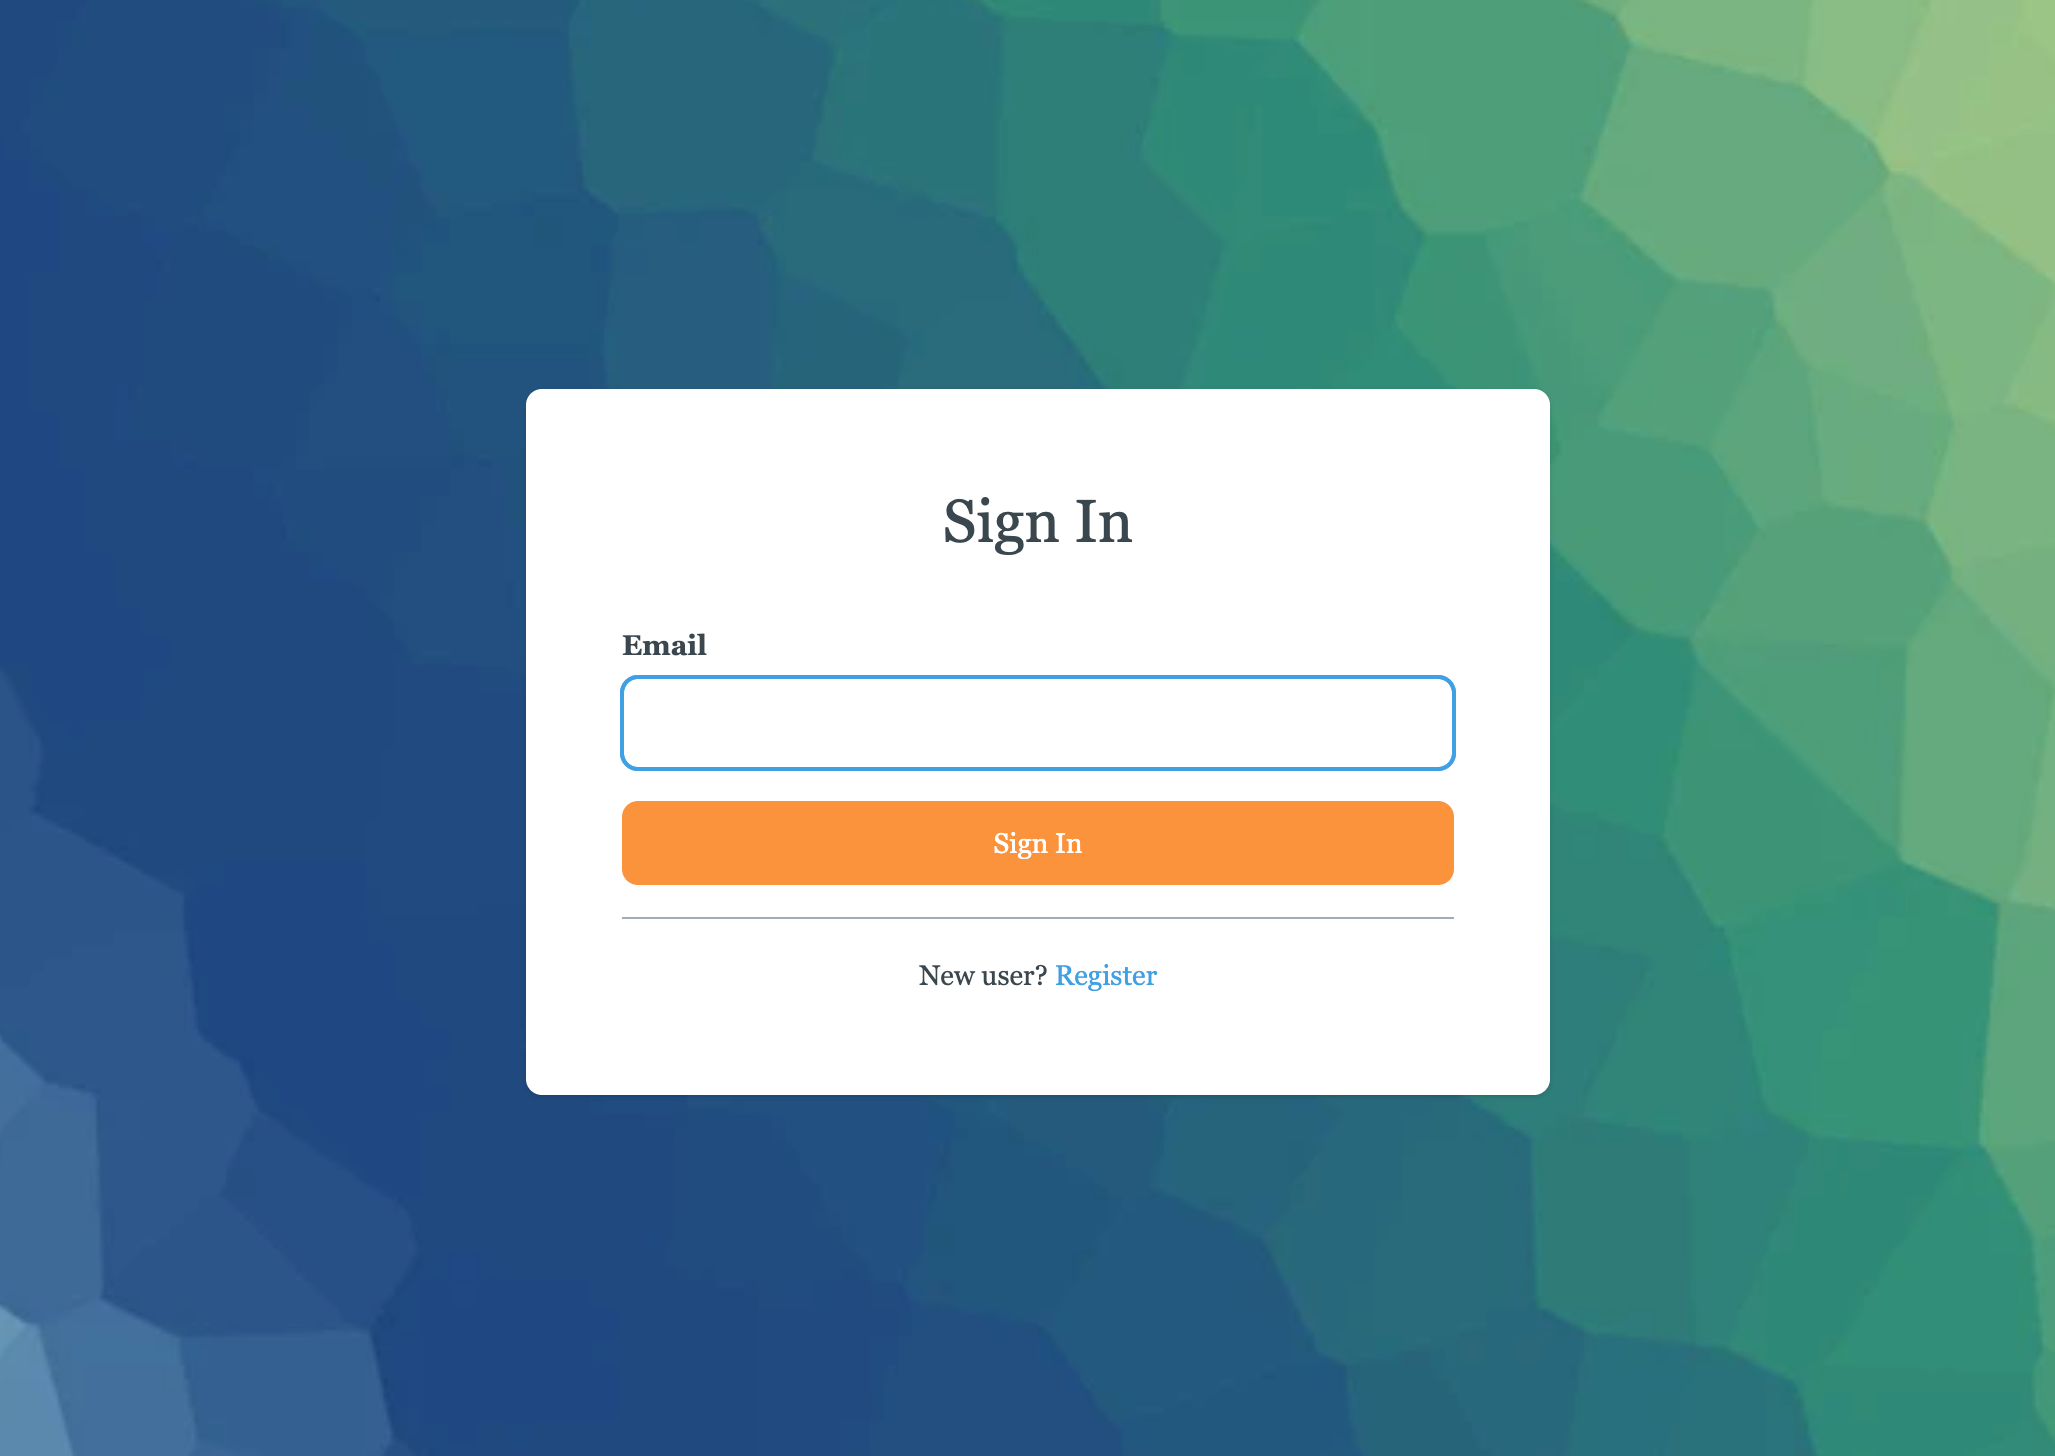
Go back to your starter application, log out, and click the Protected link again. You will see your changes reflected in the login pages.
For example, if you’ve set the fonts to serif, the border radius to large, specified a custom button background color, and uploaded a background image, the resulting login page could look like this:
Authentication methods
Modern applications are not restricted to simple username/password authentication. They support registration, social logins, multi-factor authentication (MFA) mechanisms for additional security, and enforce policies for passwords and session lengths.
Navigate to the Configuration → Authentication view to get a sense of what is available. This is a powerful page where you will likely spend some time while configuring your first real application.
For the purposes of this guide, let’s focus on customizing the password policy and enabling MFA.
Password policy
In the Authentication view, scroll down to the Email & Password section, then click Configure Email & Password to open the password policy settings:
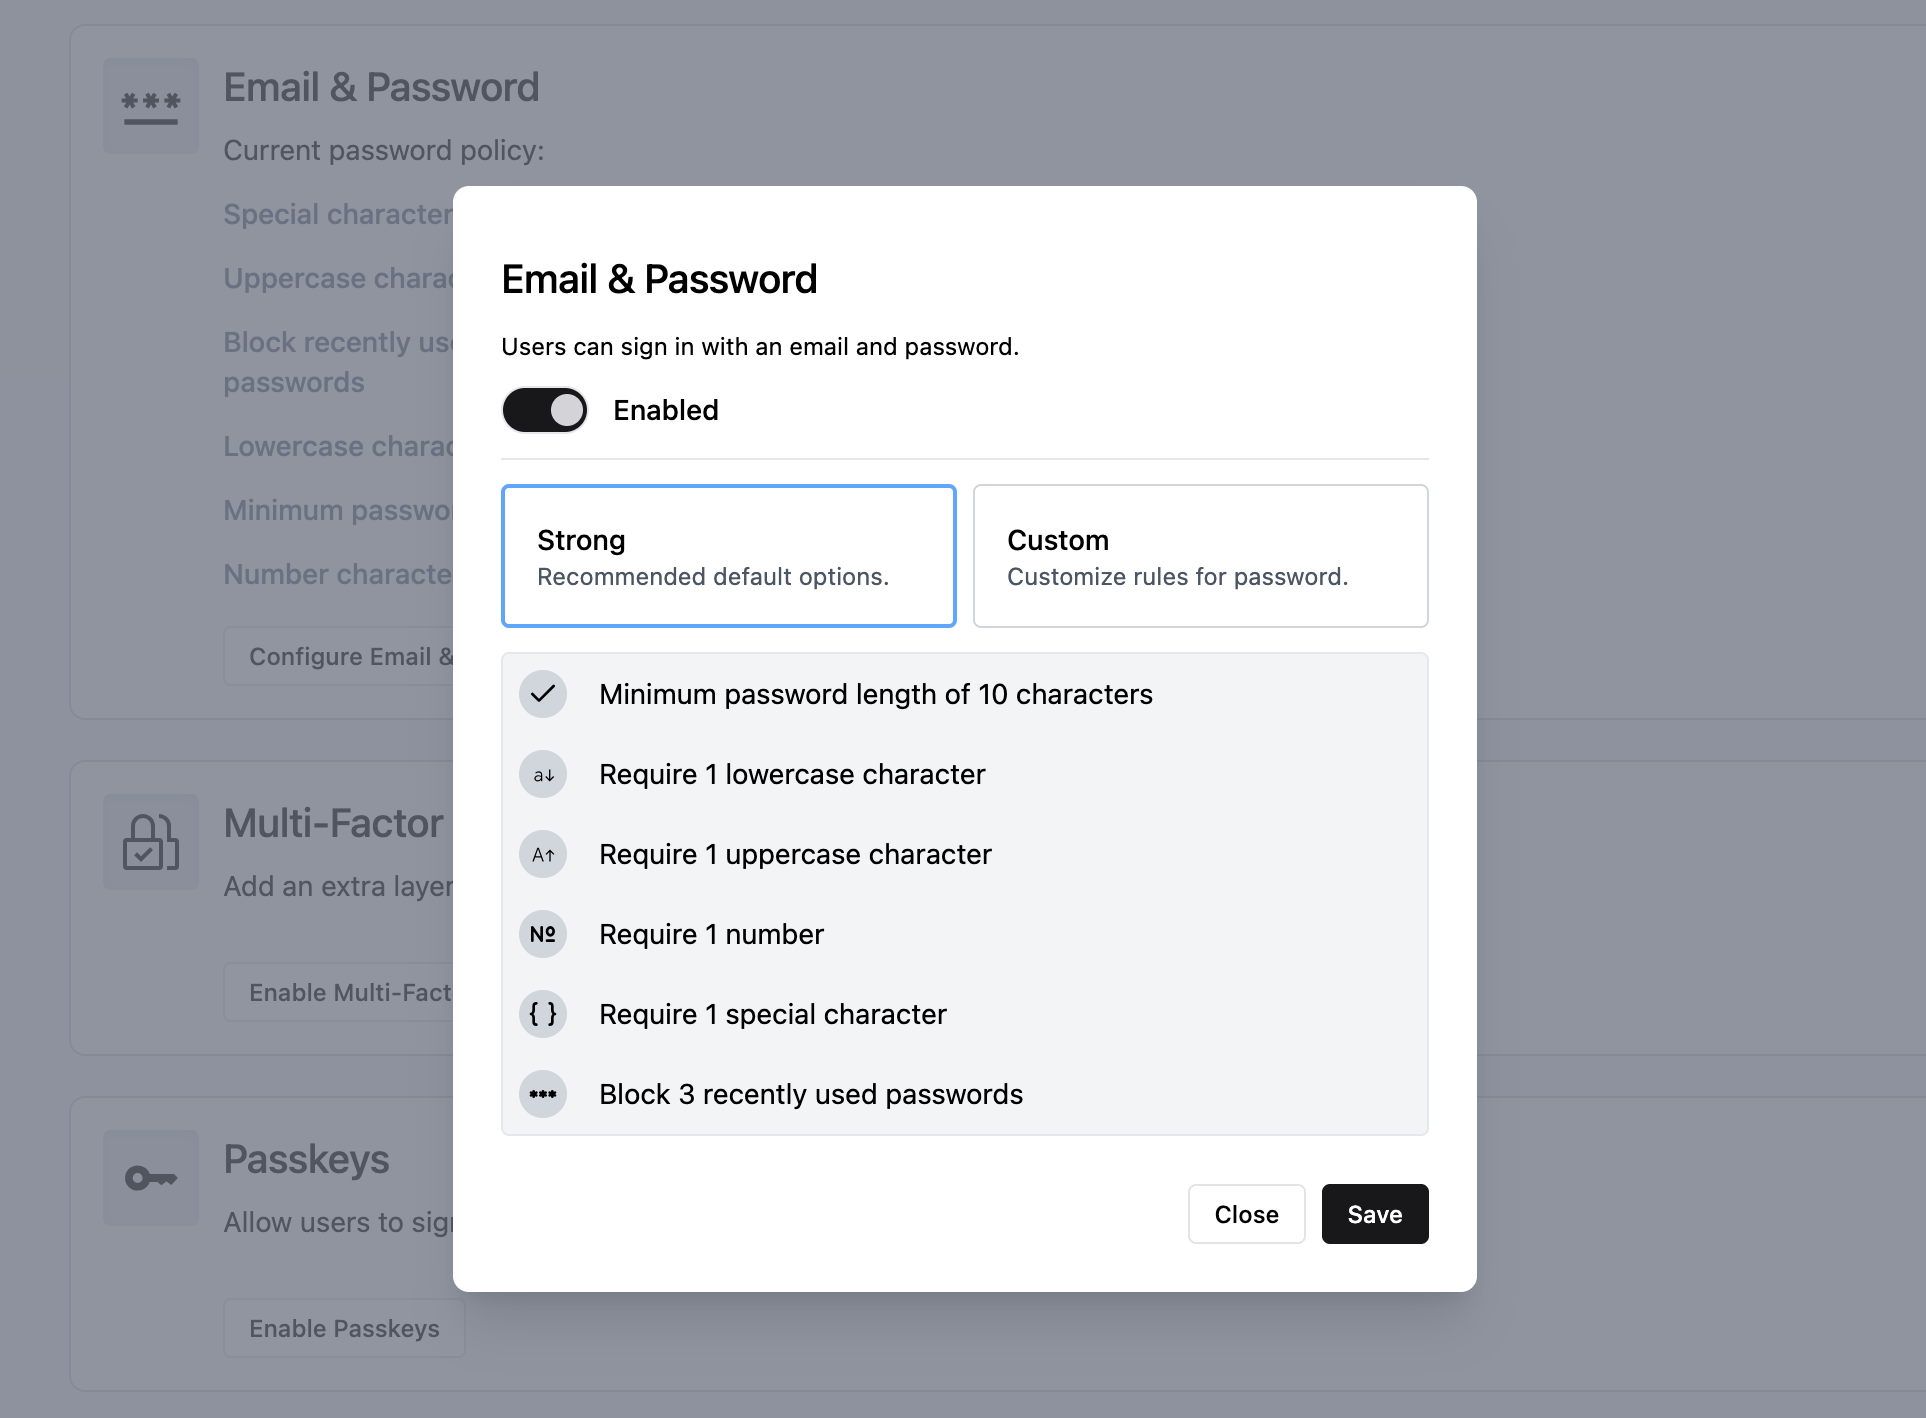
As you can see, Auth.it enables a strong password policy out of the box, including a minimum length of 10 characters, requirements for the types of characters used, and blocking the 3 most recent passwords when rotating passwords.
You can customize the default password policy by clicking Custom and entering different values for each of the password policy parameters. For example, to make your password policy more friendly to password manager users, set Minimum password length to 15 and Number of special characters to 0, then click Save.
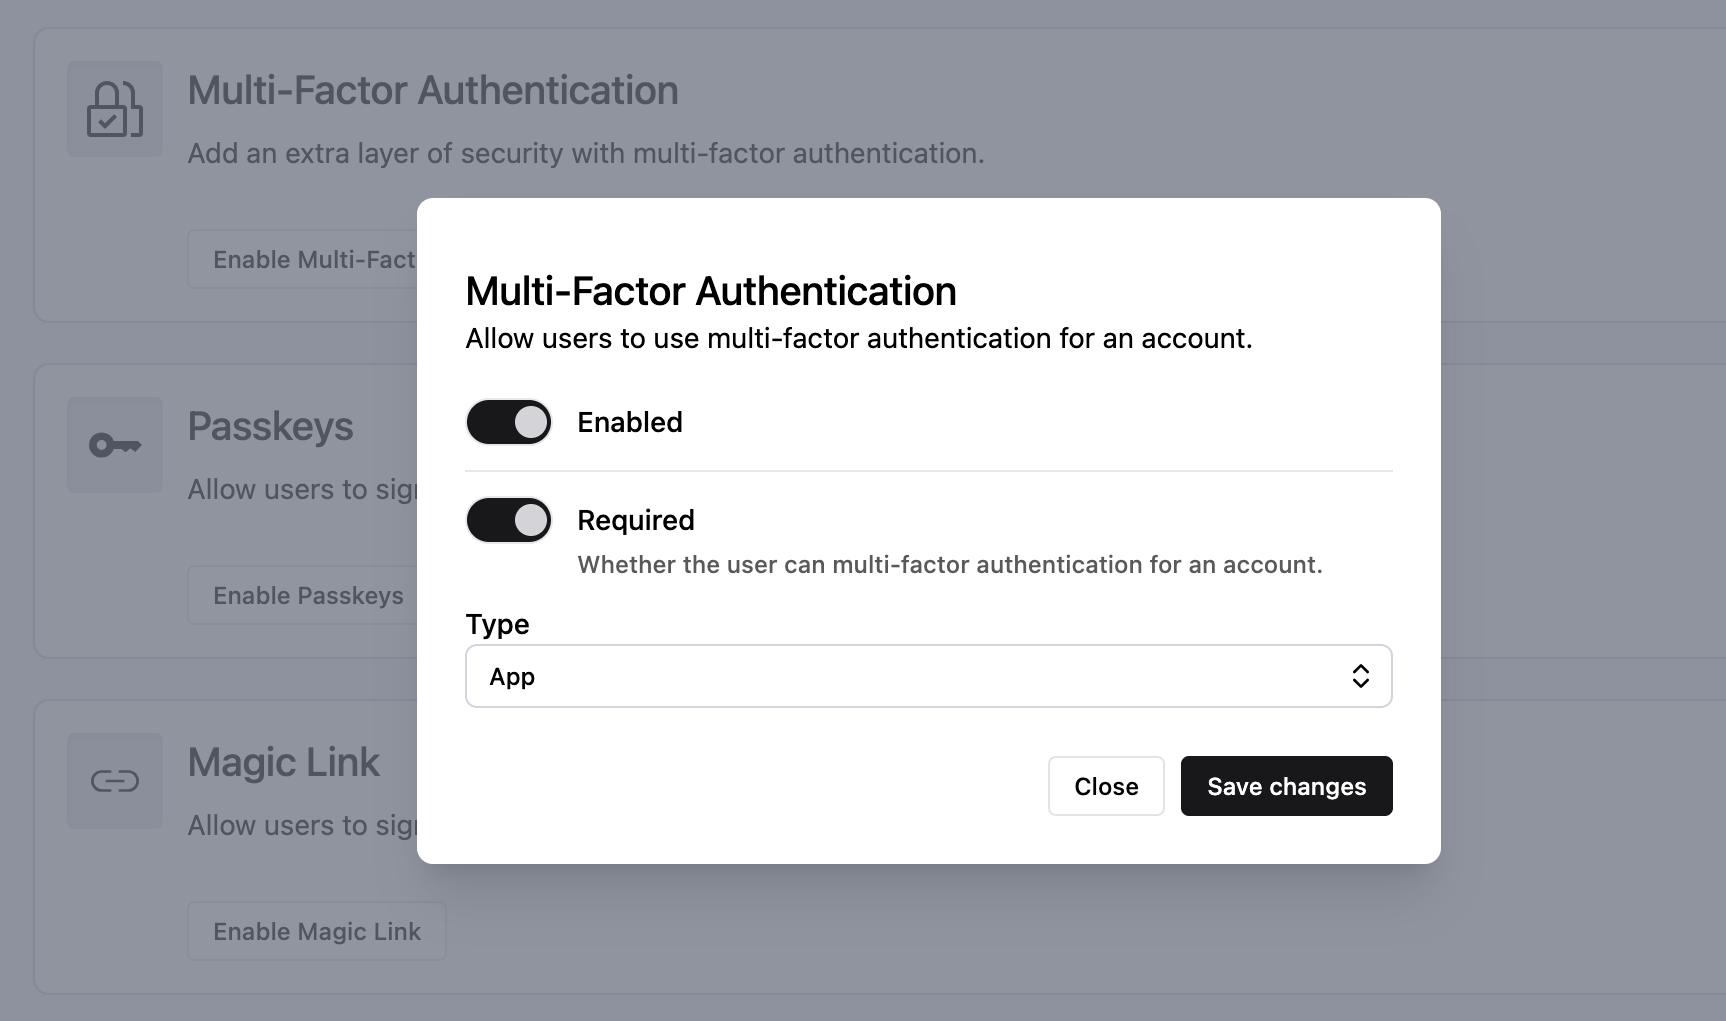
Multi-factor authentication (MFA)
Back in the Authentication view, go to the Multi-Factor Authentication section. Click Enable Multi-Factor Authentication to open the settings window.
By default, MFA is disabled and not required. Click both toggles to enable and require it, then click Save changes:
Now go back to your starter application, log out, and click the Protected link again. After successfully authenticating with your username and password, you will be prompted to set up a TOTP application (such as Google Authenticator) so that you can enter a one-time code every time you log in:

You’ve now easily added MFA enforcement to your application.
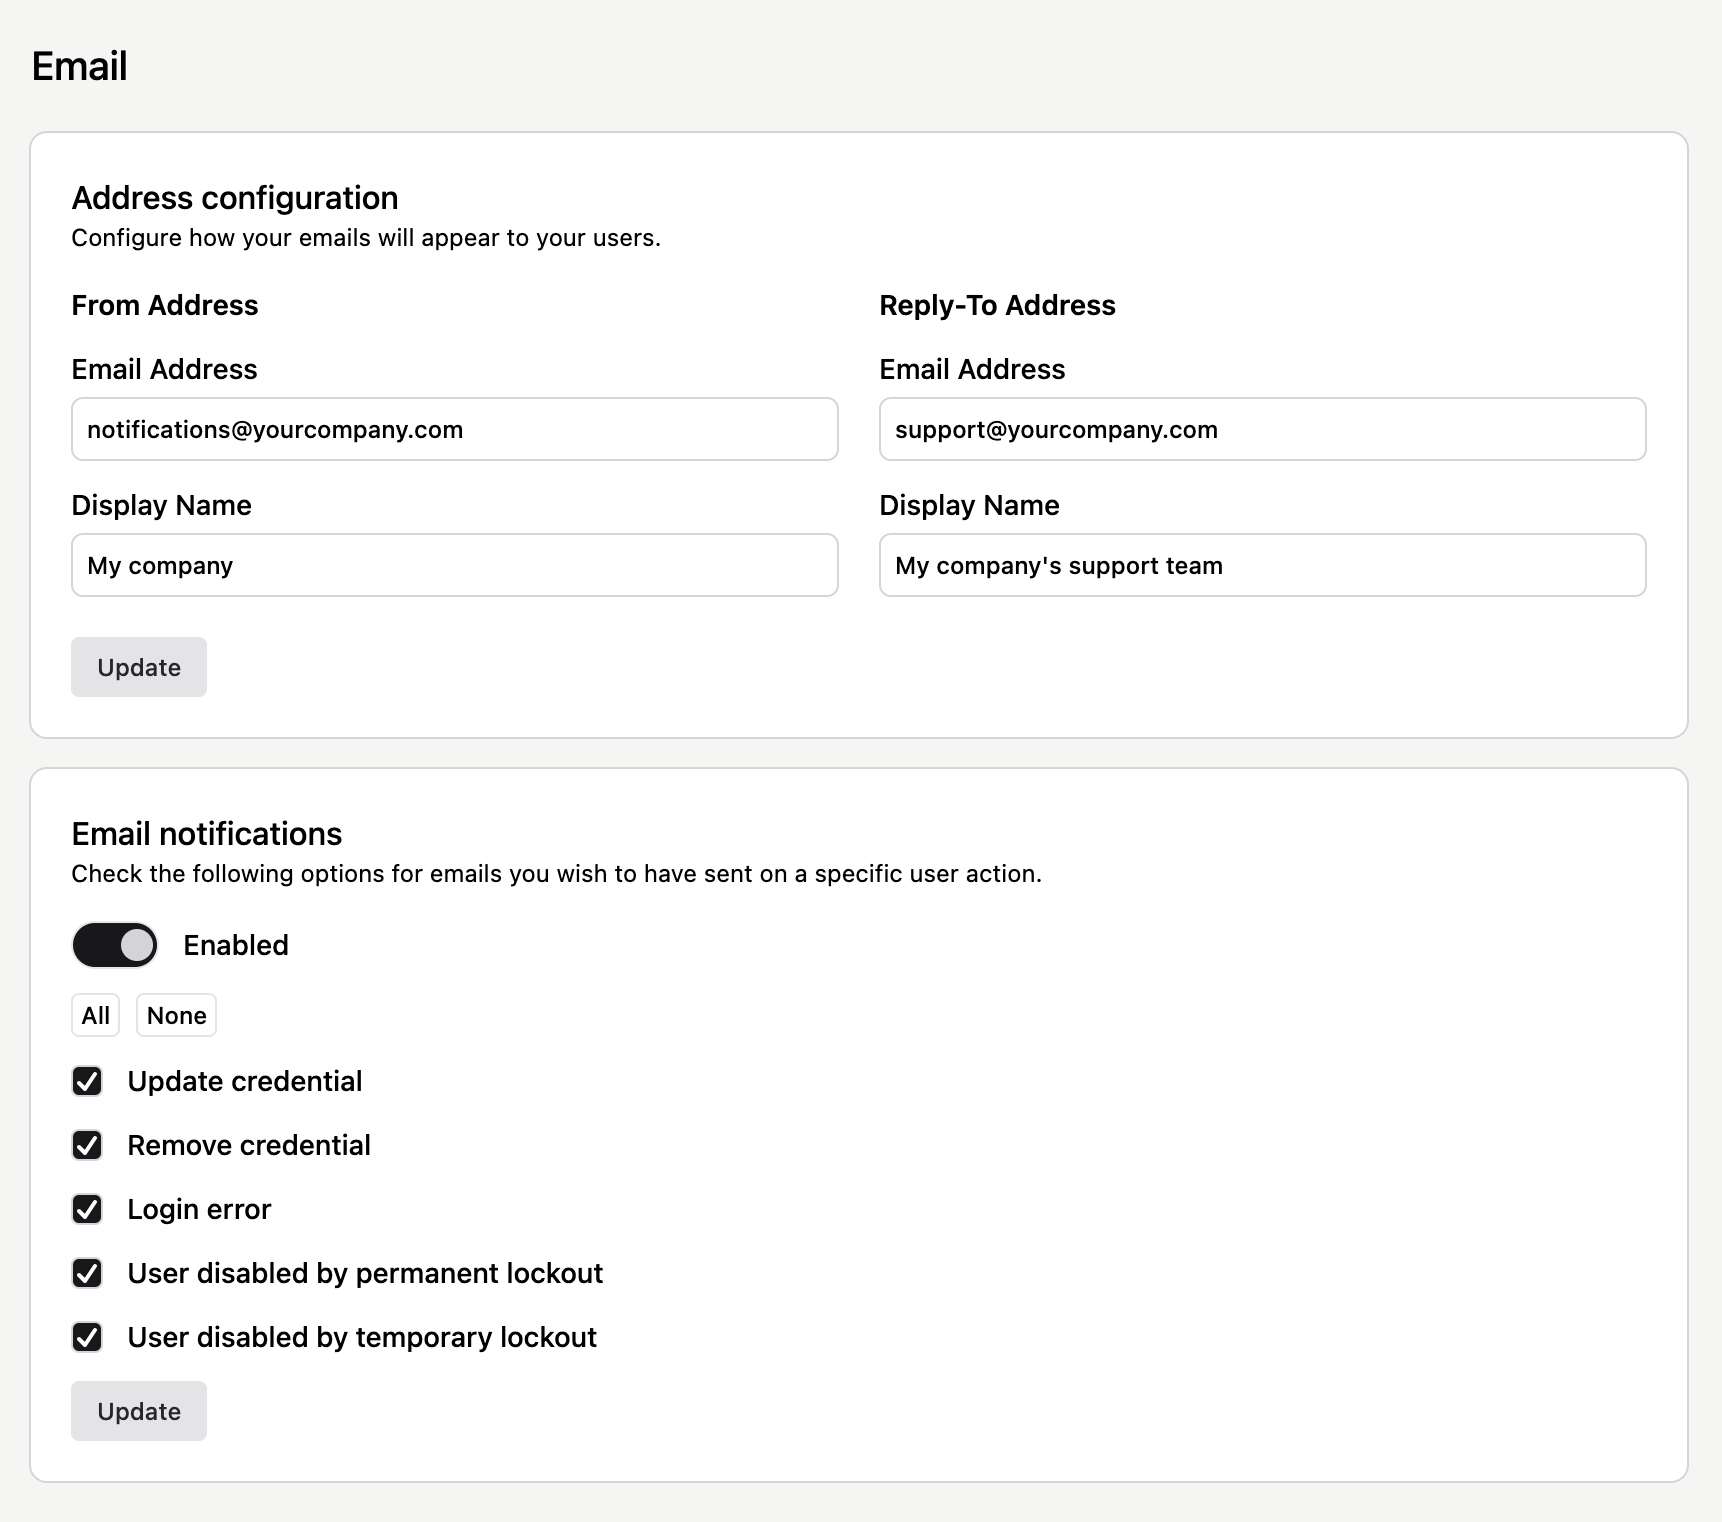
Auth.it can send users email notifications for actions such as verifying a user’s email, allowing password resets, and other essential messages regarding user authentication. This is configured in the Configuration → Email view. Once there, you can:
- Enable or disable email notifications for various events.
- Brand your emails with addresses and display names that your users will recognize when they receive emails from your Auth.it deployment.
Summary
You’ve now walked through the essentials of setting up Auth.it: configuring the starter application, customizing login pages, and enabling security features like MFA. With these basics covered, you can start protecting your real applications and configuring them to match your security requirements and UX expectations.