Apple
Using Apple social login requires an active Apple Developer account, which is a paid service starting at $99/year.
To enable Auth.it to authenticate users with Apple, perform the following steps.
1. Enable Apple social login in Auth.it
In Auth.it’s Authentication view:
- In the Apple section, click Enable Apple.
- In the configuration pop-up, click the toggle to enable Apple integration.
- Copy the redirect URI that Auth.it displays. You will paste this later into your Apple Developer settings.
2. Configure your Apple Developer account
Go to your Apple Developer account and perform the following configuration steps.
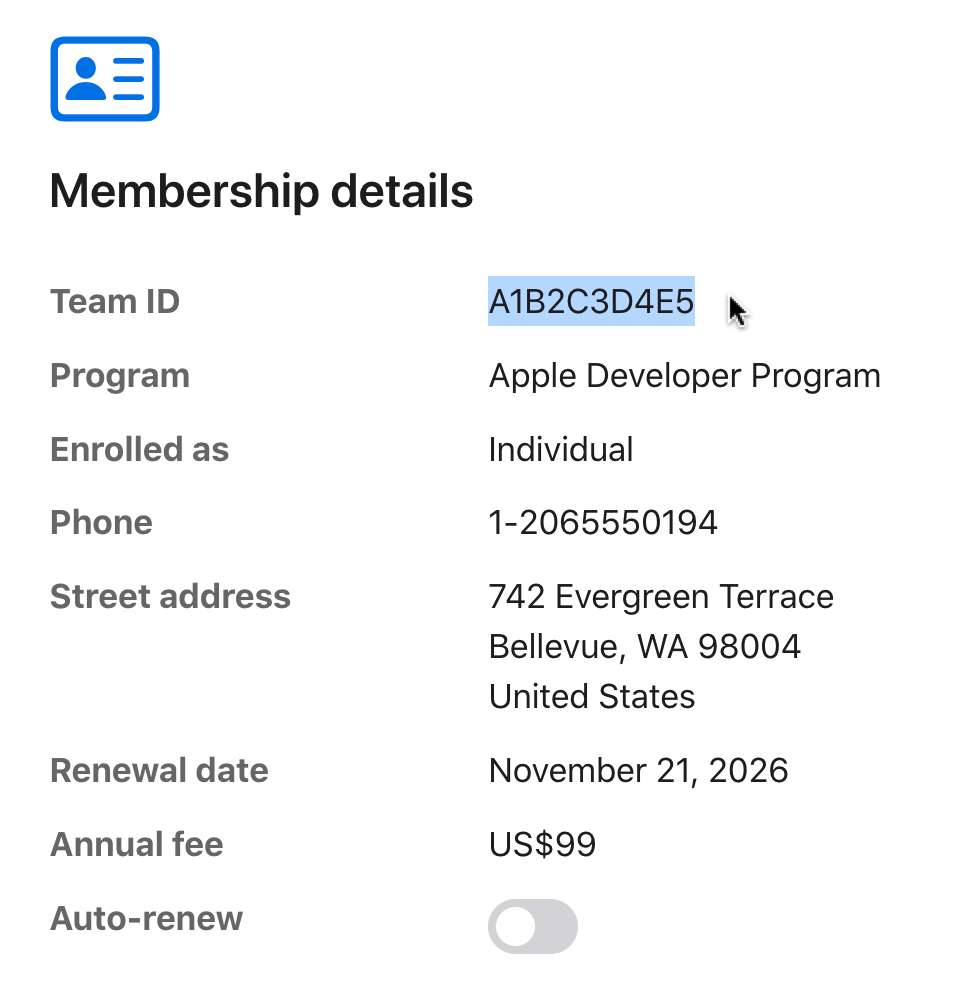
2.1. Copy your team ID
In the Account view that opens after sign-in, scroll down to the Membership details section and copy your Team ID:
2.2. Create an app ID
Although an app ID is not used directly in your Auth.it configuration, you still need it to generate a key in one of the following steps.
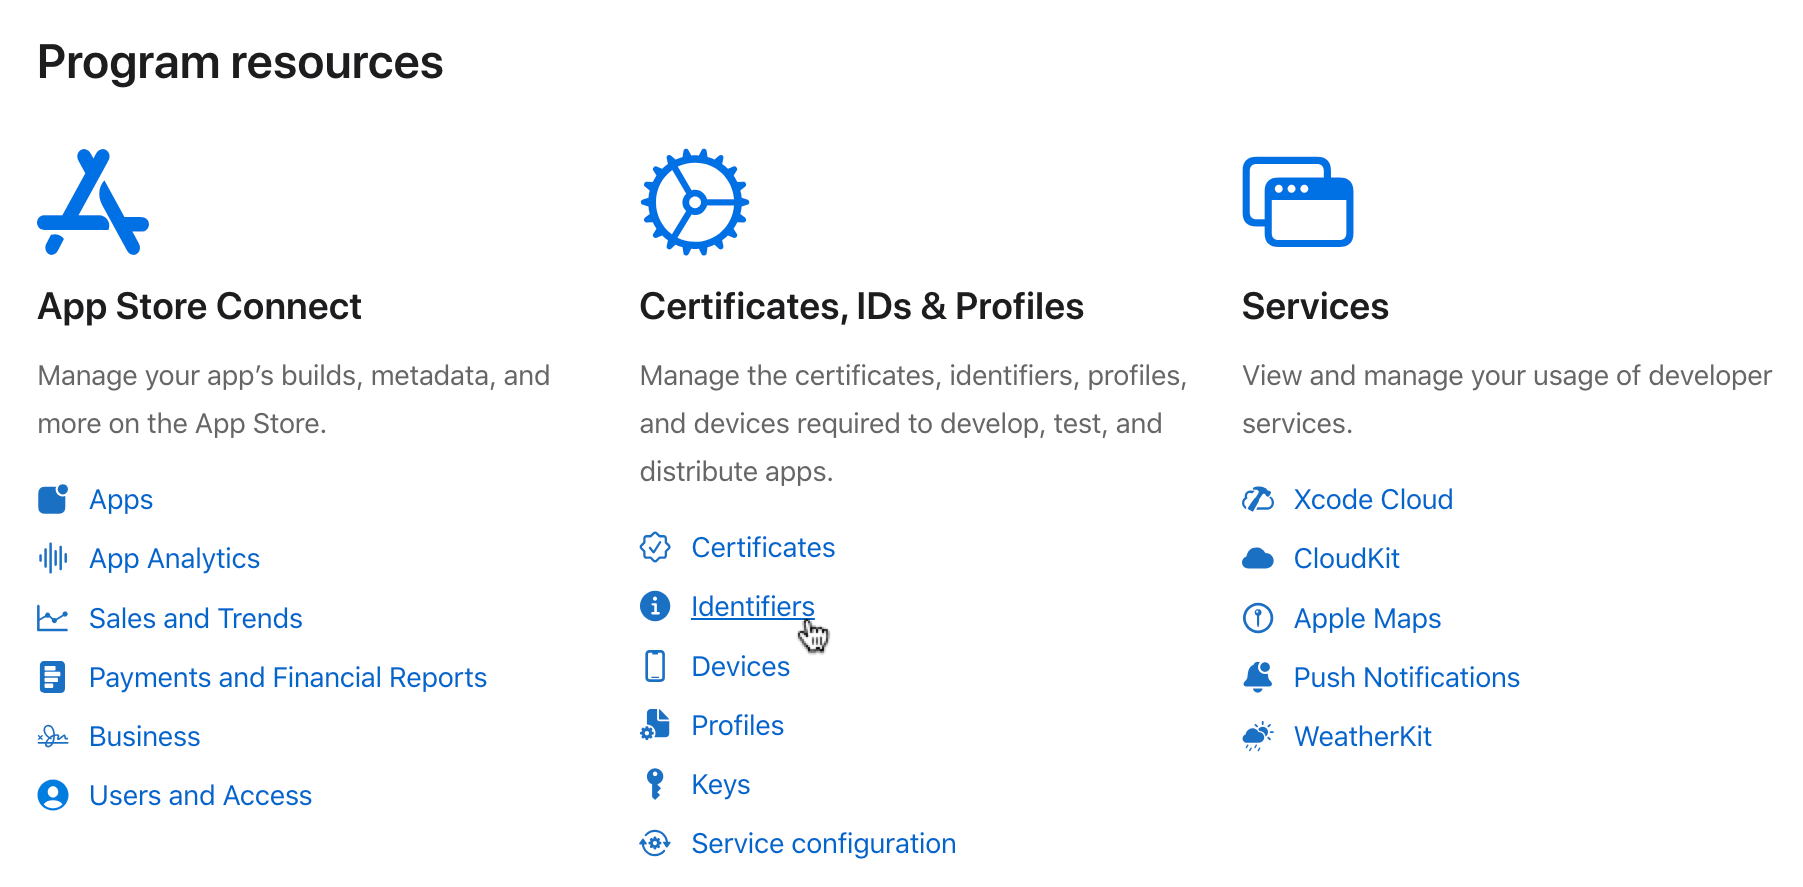
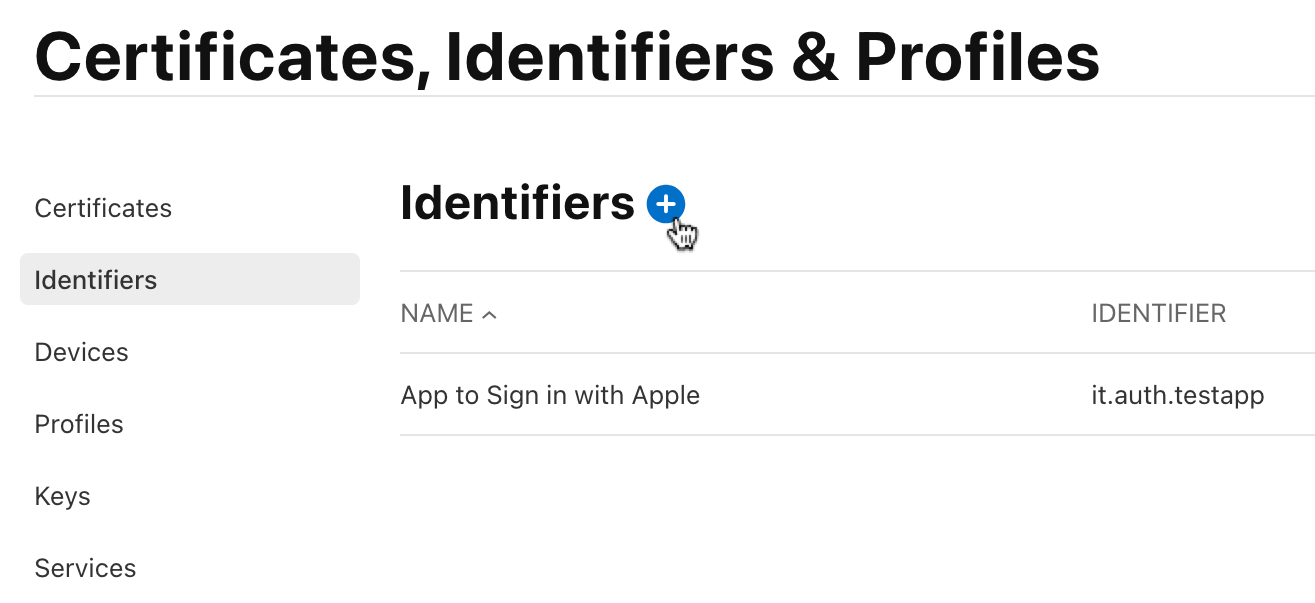
- Scroll back up to the Program resources section. Under Certificates, IDs & Profiles, click Identifiers:
- Click the + button to create a new identifier:
- Select App IDs, then click Continue.
- Select the App type, then click Continue.
- Enter a description (e.g.
App ID for social login) and a bundle ID (for example,com.example.authit.apple-app-id):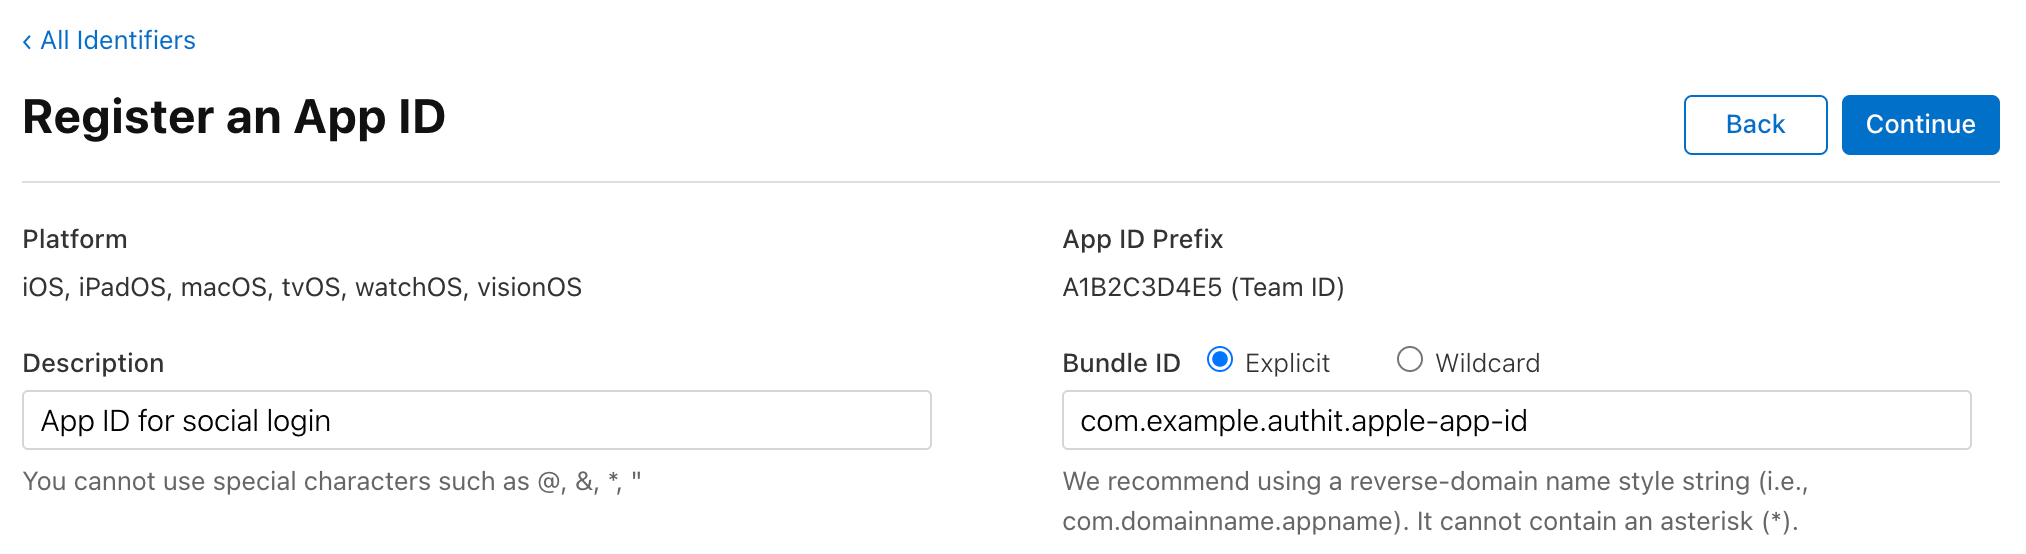
- Under Capabilities, scroll down and select the Sign in with Apple checkbox.
- Click Continue, then Register.
2.3. Create and copy a service ID
- In the list of identifiers, click + again to create a new identifier.
- Select Services IDs, then click Continue.
- Enter a description (e.g. “Apple social login”) and a reverse-domain-name-style identifier (e.g.
com.example.authit.apple-login— note that this must not match the bundle ID of your app ID), then click Continue. - On the next screen, click Register.
- Once the new service ID is created, click its entry in the list of IDs. This opens the details view for the service ID.
- Copy the identifier from the details view. This is your Apple service ID:

- In the same details view, select the Sign In with Apple checkbox.
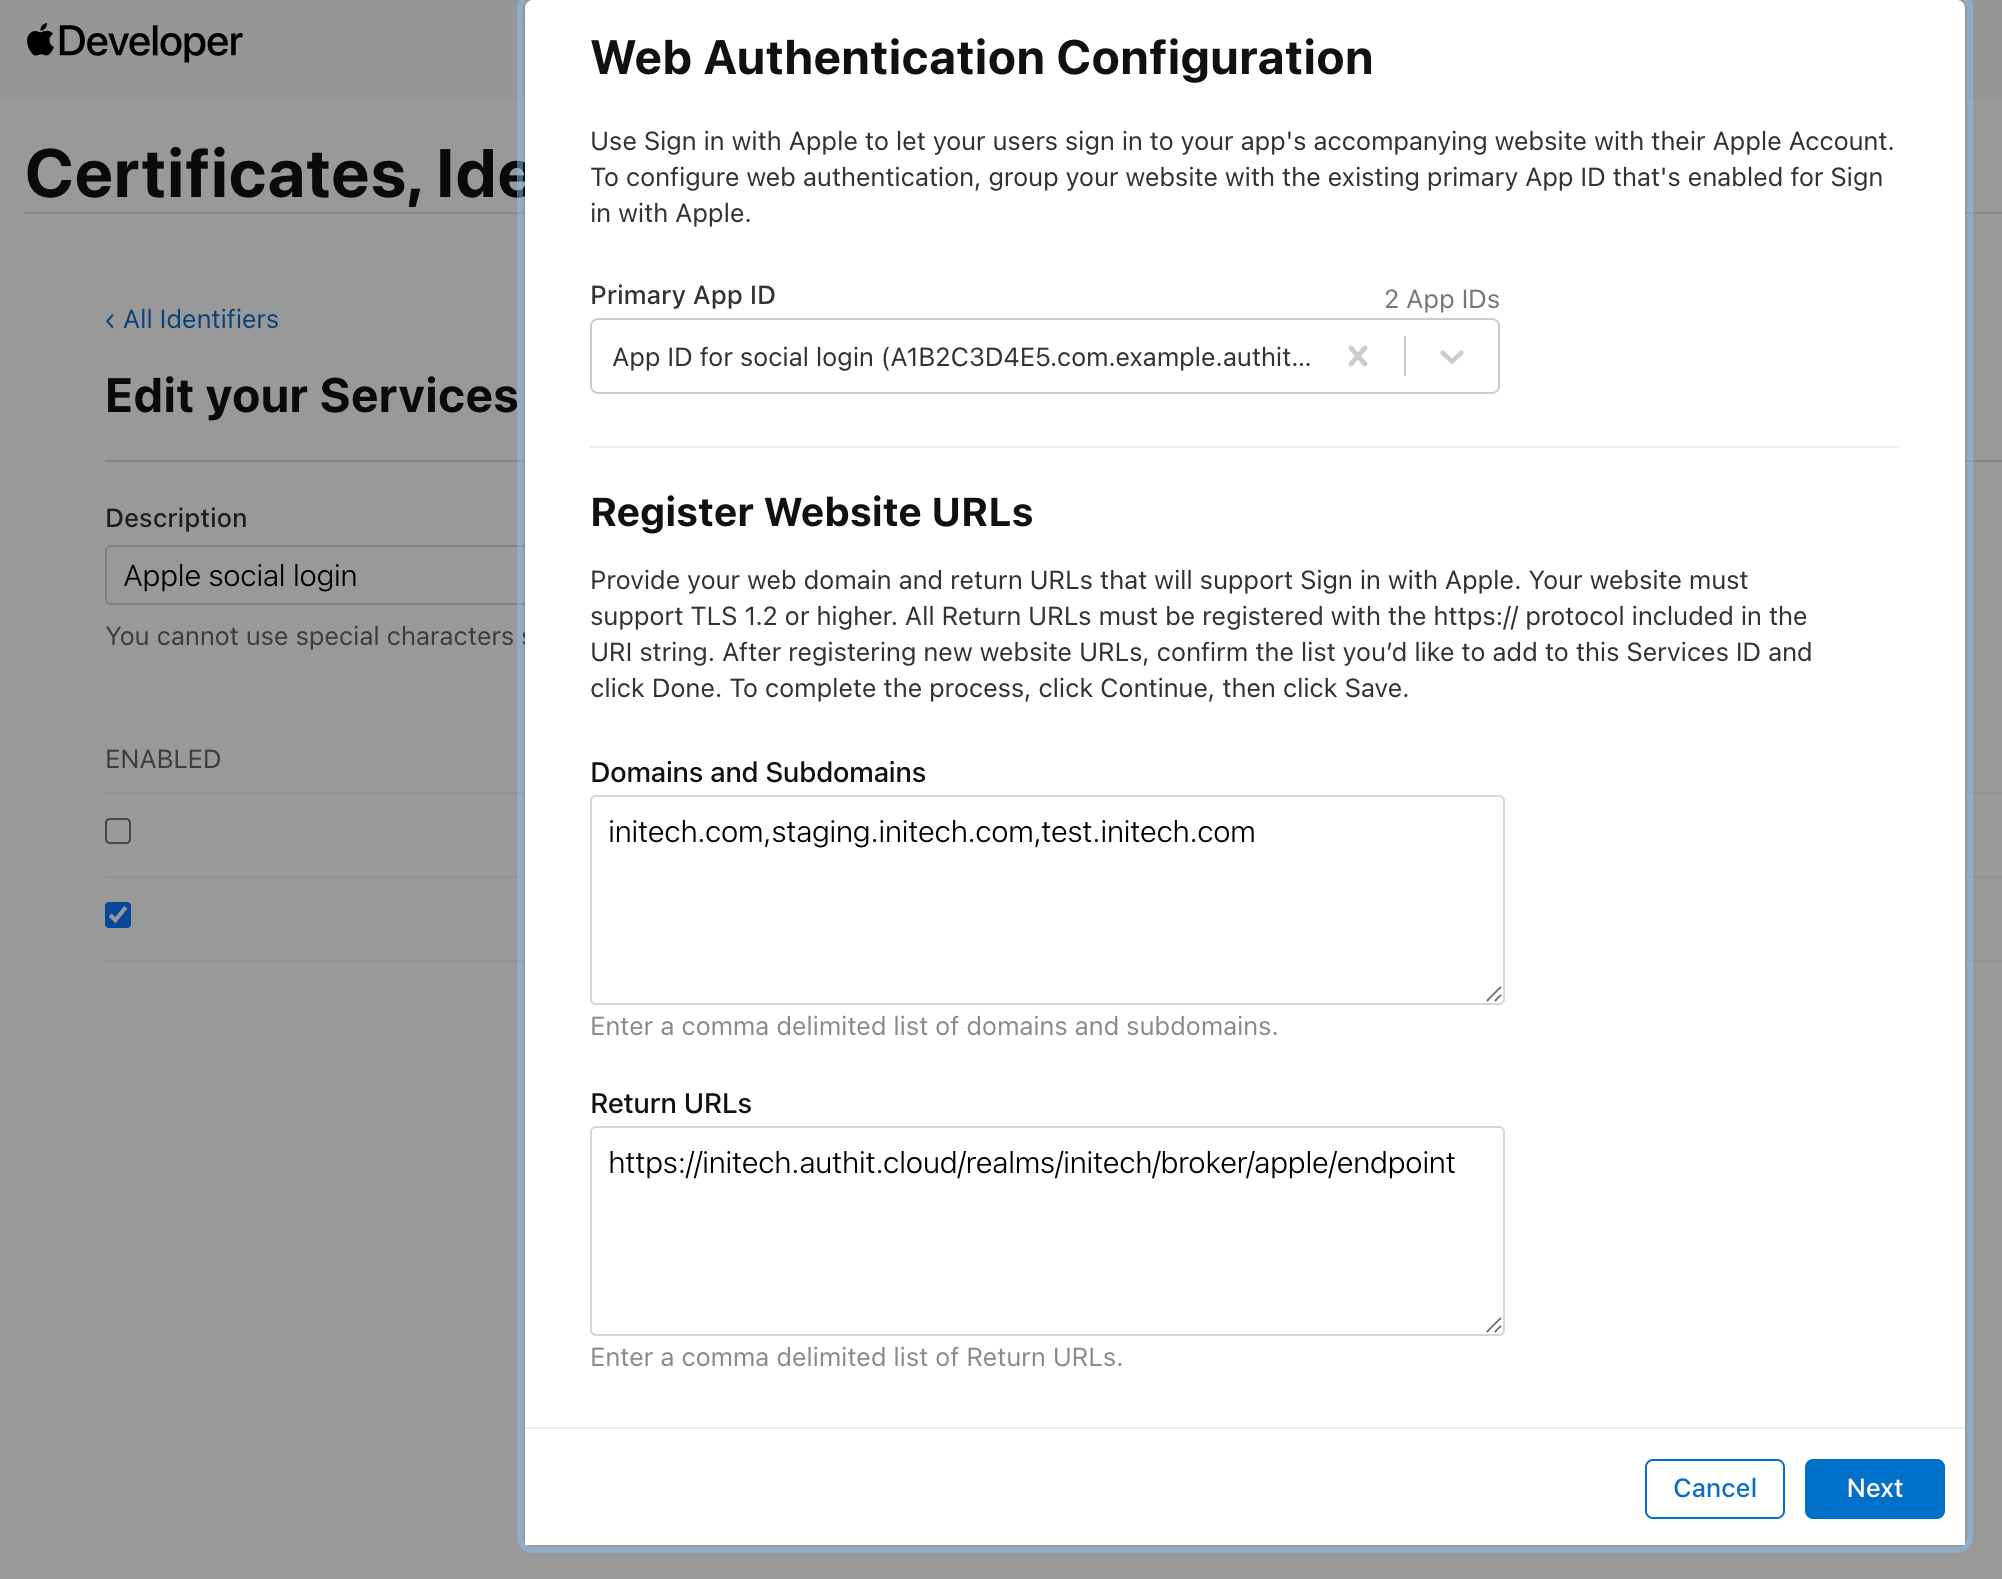
- Click the Configure button next to Sign in with Apple. This opens the Web Authentication Configuration pop-up.
- Under Domains and Subdomains, add a comma-separated list of your application’s domains, including any non-production instances. Do not include the scheme or the delimiter: enter
example.cominstead ofhttps://example.com.localhostwill not work here. For testing purposes, consider using ngrok or a similar service to expose your local development instance to the internet. If you do, remember to add the external domain to the list of Redirect URIs for the frontend application in Auth.it’s Applications page. - Under Return URLs, paste the redirect URI you copied from Auth.it. The Web Authentication Configuration pop-up should now look like this:
- Click Next, then Done.
- Back on the service ID details screen, click Continue.
- On the Edit your Services ID Configuration screen, click Save.
2.4. Create and download a private key and copy the key ID
- Back in Certificates, Identifiers & Profiles, click Keys:

- Click the + button to create a new key.
- In the Register a New Key view, enter a key name (e.g.
Key for social login). - Select the Sign in with Apple checkbox:

- Click Configure for Sign in with Apple.
- In the Configure Key view, select the app ID you created earlier in the Primary App ID dropdown.
- Click Save.
- Back in the Register a New Key view, click Continue, then Register.
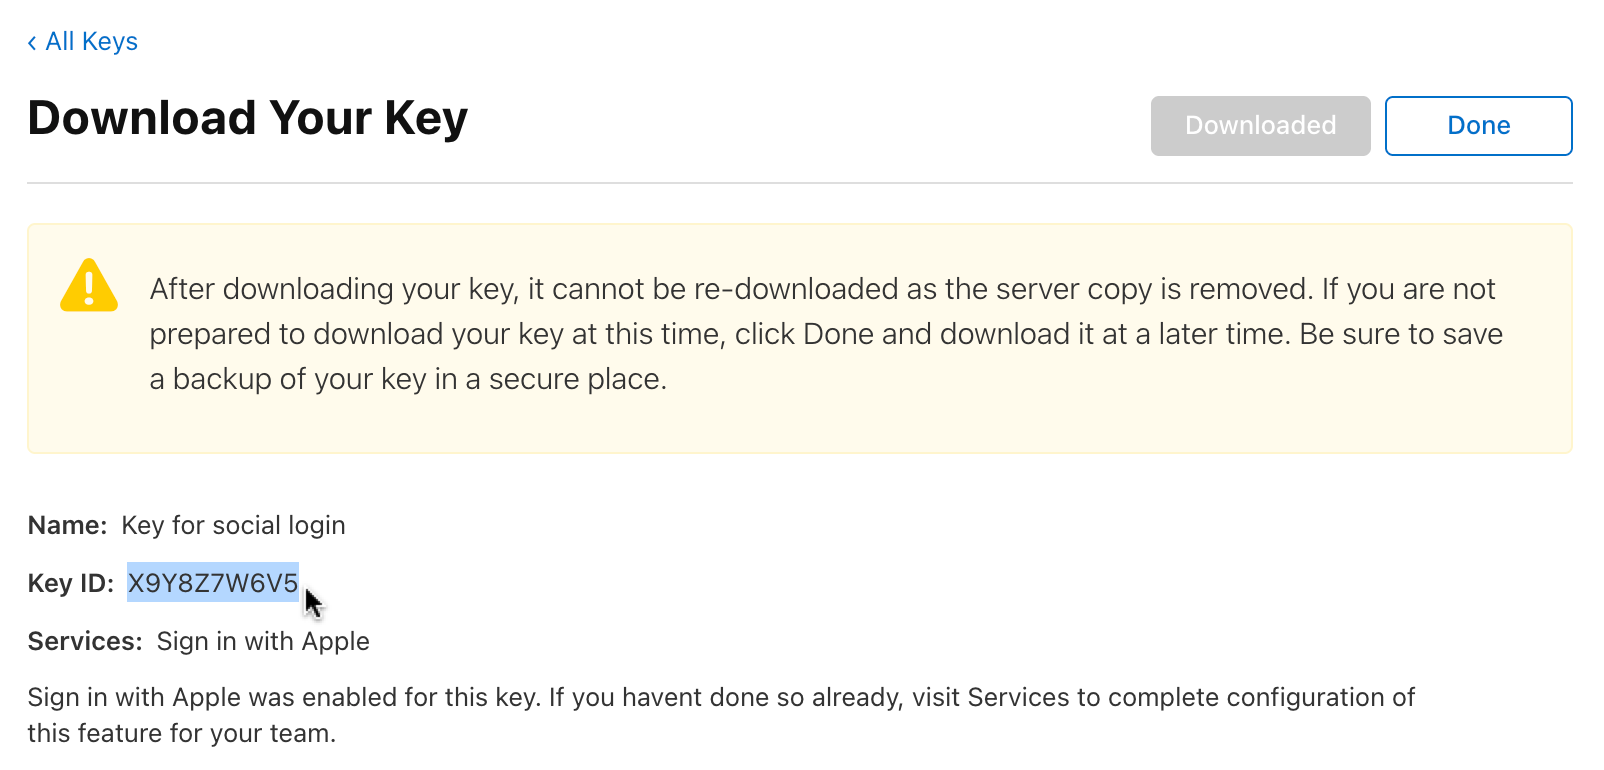
- In the Download Your Key view, click Download. Save the downloaded
.p8key file. This file is your Apple private key. Keep it secure — it cannot be downloaded again. - Copy the Key ID displayed in the Download Your Key view. This is your private key ID:
3. Complete Auth.it’s Apple configuration
Back in Auth.it’s Apple configuration pop-up:
- Paste your Apple service ID into Apple Client ID.
- Open the
.p8key file you downloaded and paste its contents into Apple Client Secret. - Paste your Apple team ID into Apple Team ID.
- Paste the private key ID into Apple Key ID. Here’s what the final configuration should look like:
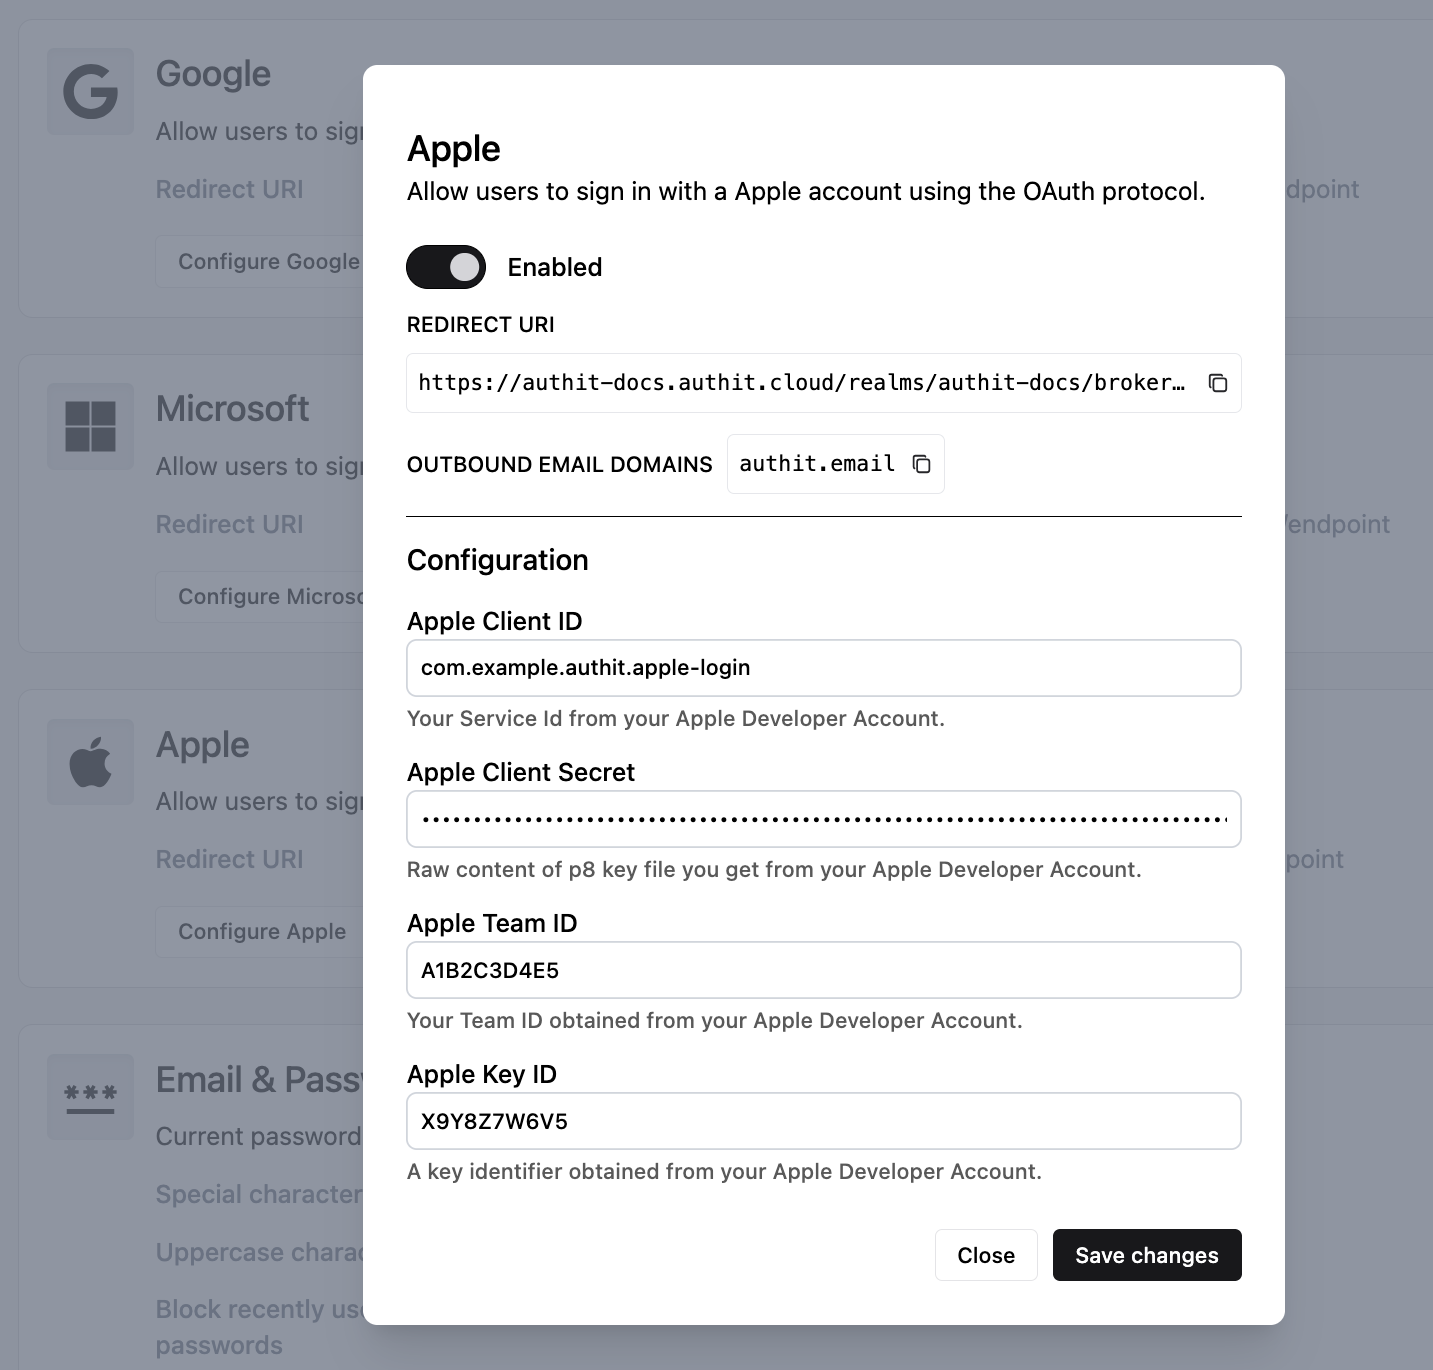
- Click Save changes.
4. Test that the Apple integration is working
- In your application, go to the login page. Notice that it now contains a button to log in with Apple:
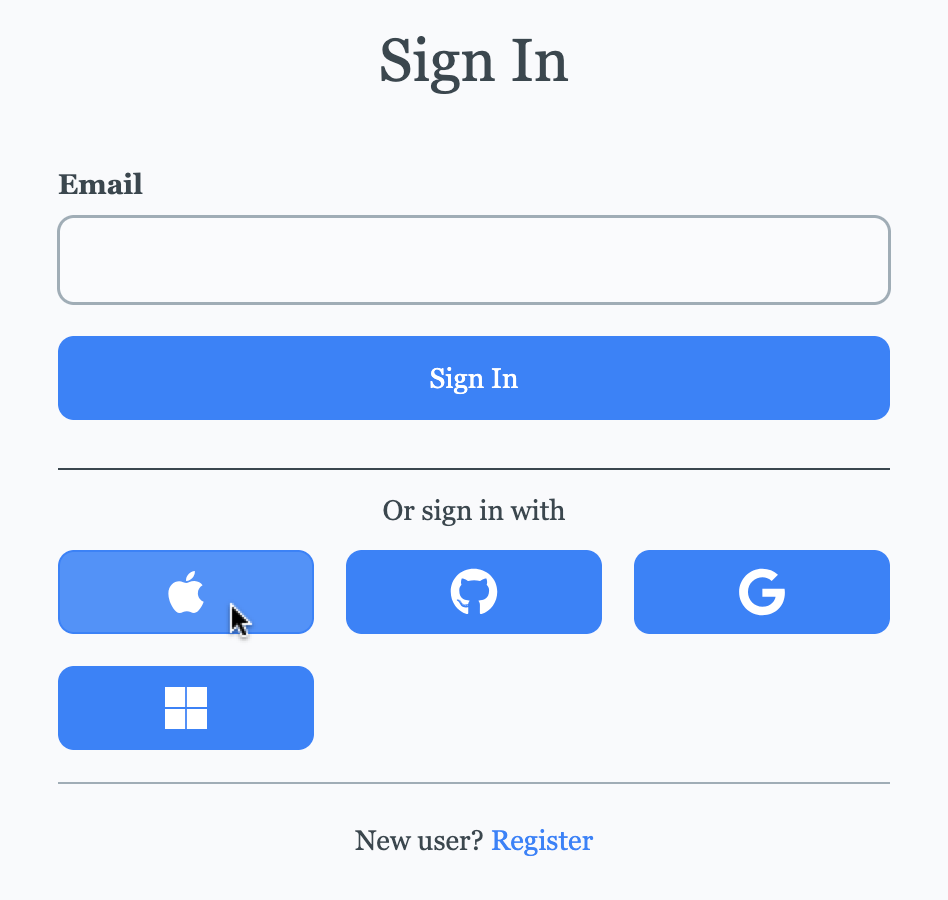
- Click the Apple login button.
- You should see the Apple login dialog. Enter your Apple ID and password, then authorize the application.

- You are now logged in with your Apple ID and redirected back to your application.